Category: WordPress Performance

Tips and guides for optimizing WordPress performance

  • WordPress Speed for Agencies: Managing Performance Across Client Sites

    WordPress Speed for Agencies: Managing Performance Across Client Sites

    Managing speed optimization for one WordPress site is a technical challenge. Managing it across 20, 50, or 100 client sites is an operational one. Individual site knowledge doesn’t scale — you need systems, standardized processes, and tools that work across your entire portfolio. The agencies that figure this out turn performance into a competitive advantage and a recurring revenue stream. Those that don’t spend their time firefighting slow sites and apologizing to frustrated clients.

    This guide is for agency owners, technical leads, and freelance developers who manage multiple WordPress sites. It covers how to build a scalable speed optimization practice — from standardized workflows and hosting strategies to client reporting and knowing when to outsource. If you’re new to WordPress performance fundamentals, start with our Core Web Vitals guide, business case for speed, and 15 speed mistakes guide — then come back here to apply those concepts at scale.


    Why Speed Is an Agency Differentiator

    Speed is no longer a nice-to-have. Clients see their Core Web Vitals in Google Search Console, they compare their site to competitors, and they understand (at least intuitively) that slow sites lose customers. Agencies that proactively manage performance — instead of waiting for complaints — see measurably better client retention and higher lifetime value.

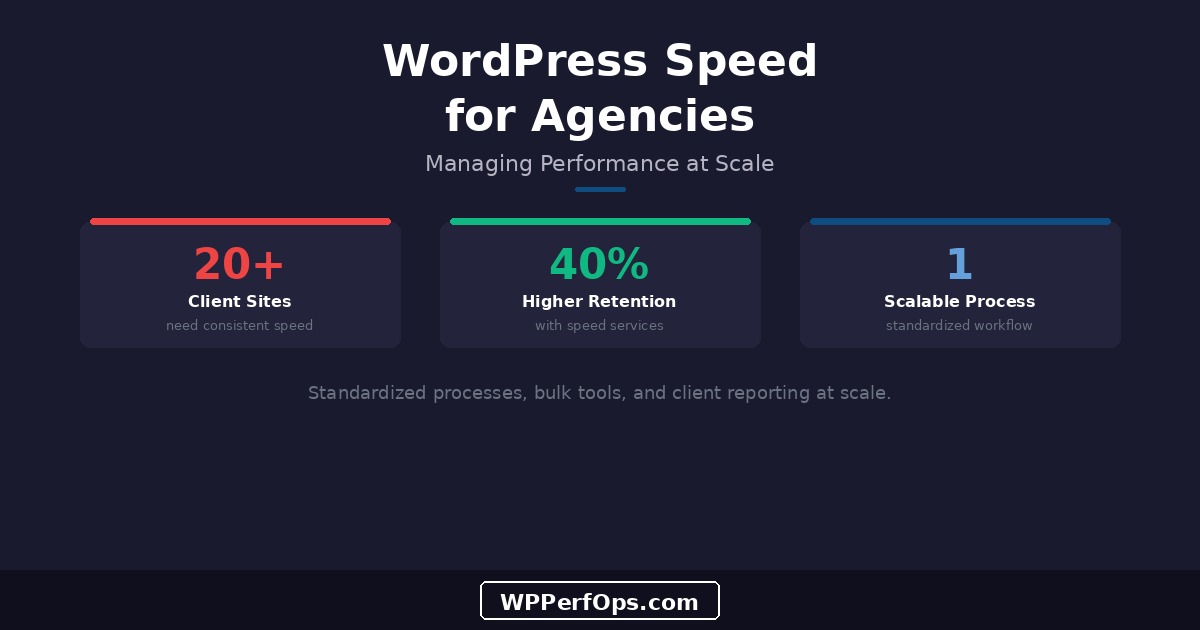
    With Speed Services

    40%

    higher client retention

    Recurring Revenue

    $$$

    from maintenance retainers

    Speed optimization is also one of the few services with objectively measurable results. You can show a client their load time went from 5.2s to 1.8s, their PageSpeed score went from 42 to 94, and their bounce rate dropped 15%. That’s harder to argue with than “we updated your brand voice” or “we refined your content strategy.” Measurable results build trust, justify retainers, and generate referrals.


    Standardizing Your Optimization Process

    The biggest mistake agencies make with performance is treating every site as a unique problem. When each team member uses different tools, different caching plugins, and different optimization approaches, you can’t predict results, train new hires efficiently, or compare performance across clients.

    Start With a Standardized Checklist

    Our 33-step speed optimization checklist is designed to be a repeatable framework. Customize it for your agency’s preferred hosting stack, caching plugin, and image optimization tool — then use it as the standard process for every client engagement. New team members follow the checklist. Experienced developers refine it. Everyone produces consistent results.

    Key standardization decisions: choose one caching plugin and use it everywhere (we recommend WP Super Cache, LiteSpeed Cache, or WP Rocket depending on hosting). Choose one image optimization service (ShortPixel’s API works well at scale). Choose one hosting infrastructure and understand it deeply rather than managing a dozen different hosts with different quirks.


    Hosting Strategy for Multiple Sites

    Your hosting architecture is the most impactful decision you’ll make for agency-wide performance. There are two viable approaches.

    Managed WordPress hosting (Kinsta, WP Engine, Cloudways) is the lower-maintenance option. Each client gets a managed site with built-in caching, CDN, staging, and automatic backups. You focus on WordPress-level optimization without worrying about server configuration. The tradeoff is cost — at $30-50/site/month, hosting 50 client sites adds up.

    VPS with management panels (DigitalOcean/Vultr + GridPane or SpinupWP) gives you more control at lower per-site cost. A $80/month VPS can comfortably host 20-30 WordPress sites with excellent performance. You manage the server stack (Nginx, PHP-FPM, Redis, MySQL) through the panel, giving you the ability to tune configurations across all sites simultaneously. For a deeper look at hosting options, see our hosting for speed guide.


    Bulk Optimization Tools

    Managing 20+ WordPress sites individually is unsustainable. These tools let you manage updates, monitoring, and maintenance from a single dashboard.

    • ManageWP or MainWP — Centralized dashboard for plugin/theme updates, backups, uptime monitoring, and security scanning across all client sites
    • ShortPixel API — Bulk image optimization with volume pricing. Process thousands of images across multiple sites from a single account
    • WP-CLI scripts — Automate database maintenance, cache flushing, and health checks via cron jobs on your servers
    • Query Monitor — Install temporarily on staging environments to audit plugin performance and database query efficiency

    Client Reporting and Communication

    Clients don’t care about TTFB or render-blocking resources. They care about “is my site fast?” and “is it helping my business?” Your reporting should translate technical metrics into business outcomes.

    A monthly speed report should include: current PageSpeed scores (mobile and desktop), Core Web Vitals status (passing or failing), load time trend over the past month, and any optimization work performed. If you have access to analytics, correlate speed improvements with bounce rate and conversion changes — that’s the data that justifies your retainer.

    Create a Branded Report Template

    Build a one-page speed report template with your agency branding. Include: a green/yellow/red status indicator for overall performance, key metrics with month-over-month trends, and a brief summary of maintenance performed. Clients love seeing numbers improve — and branded reports reinforce that you’re the reason they’re improving. Set expectations that speed is ongoing maintenance, not a one-time fix (see our speed regression guide for why).


    Common Agency Anti-Patterns

    !

    Inconsistent Stacks = Compounding Technical Debt

    When every client site uses a different hosting provider, different caching plugin, different image optimizer, and different theme framework, every optimization project is a unique puzzle. Your team can’t build expertise because the stack changes with each client. Troubleshooting takes 3x longer because you’re Googling provider-specific issues instead of drawing on experience. Standardize your stack and you’ll deliver faster results at lower cost.

    • Using a different hosting provider and tech stack for every client
    • Over-promising speed gains without auditing the site first
    • Ignoring performance until the client complains about it
    • Not monitoring sites after launch — assuming they’ll stay fast on their own
    • Standardize on 1-2 hosting providers you know deeply
    • Always audit before quoting — set realistic expectations
    • Include a performance review in every site launch checklist
    • Set up automated monitoring from day one — catch regressions before clients do

    Building Speed Into Your Development Workflow

    The cheapest performance fix is the one you don’t need because you built it right the first time. Integrate performance into your development process, not just your maintenance process.

    Performance budgets during development. Set a page weight budget (e.g., under 1.5MB total, under 400KB CSS/JS) and check against it during development. Lighthouse CI can run in your deployment pipeline and fail builds that exceed your budget.

    Plugin vetting process. Before installing any plugin for a client, check its performance impact on a staging site. Query Monitor shows exactly how many database queries and how much PHP execution time each plugin adds. A plugin that adds 200ms to every page load might not be worth its convenience.

    Image guidelines for content teams. Create a simple one-page guide for client content editors: maximum dimensions, required formats, compression requirements. Better yet, enforce these automatically with an image optimization plugin. For details, see our image optimization guide.

    Speed testing before client handoff. Run PageSpeed Insights on every key page before marking a project complete. Include the scores in your handoff documentation. This sets a performance baseline and demonstrates that you built a fast site — making future regressions clearly attributable to post-launch changes.


    When to Outsource Speed Optimization

    Not every performance problem is worth solving in-house. Complex server-level optimization (Nginx tuning, PHP-FPM configuration, MySQL query optimization) requires deep systems expertise that most web development agencies don’t have. Database optimization for WooCommerce stores with millions of rows, hosting migrations for mission-critical e-commerce sites, and diagnosing intermittent performance issues across load-balanced infrastructure — these are specialist problems.

    This is where white-label partnerships make sense. You maintain the client relationship, we handle the deep technical work, and the client gets expert-level results. We work with agencies of all sizes — from freelancers who need occasional help with complex optimizations to large agencies who want a white-label speed audit they can offer under their own brand.

    If you’re interested in partnering, let’s talk. We also offer referral incentives for agencies who send speed optimization projects our way — see our services page for details.


    Scaling Your Speed Practice

    Once you have the process standardized and tools in place, speed optimization becomes a scalable service offering.

    Tiered offerings. Offer three tiers: a one-time audit (report + recommendations, client implements), a standard optimization package (you implement the recommendations), and a premium ongoing retainer (monthly maintenance + monitoring + priority support). Each tier serves a different budget and commitment level.

    Pricing models. One-time audits work well as fixed-price projects ($500-2,000 depending on site complexity). Implementation packages are best quoted after the audit reveals scope. Ongoing retainers ($200-500/month per site) are your recurring revenue engine — and they’re easier to sell when you can show monthly reports with improving metrics.

    Team training. Document your optimization playbook. Create internal training on your standardized tools and processes. The more team members who can handle routine optimizations, the more you can scale without the bottleneck of one “speed expert” handling everything.


    Keep Learning

    Build your team’s expertise with these foundational guides.

    Your Team’s Playbook

    Speed Optimization Checklist

    The 33-step framework your team can follow for every client site — standardized and repeatable.

    Read the Checklist →

    Ongoing Maintenance

    Preventing Speed Regression

    Why sites get slow again and the maintenance routine that prevents it — essential for retainer clients.

    Read the Guide →

    Sell the Value

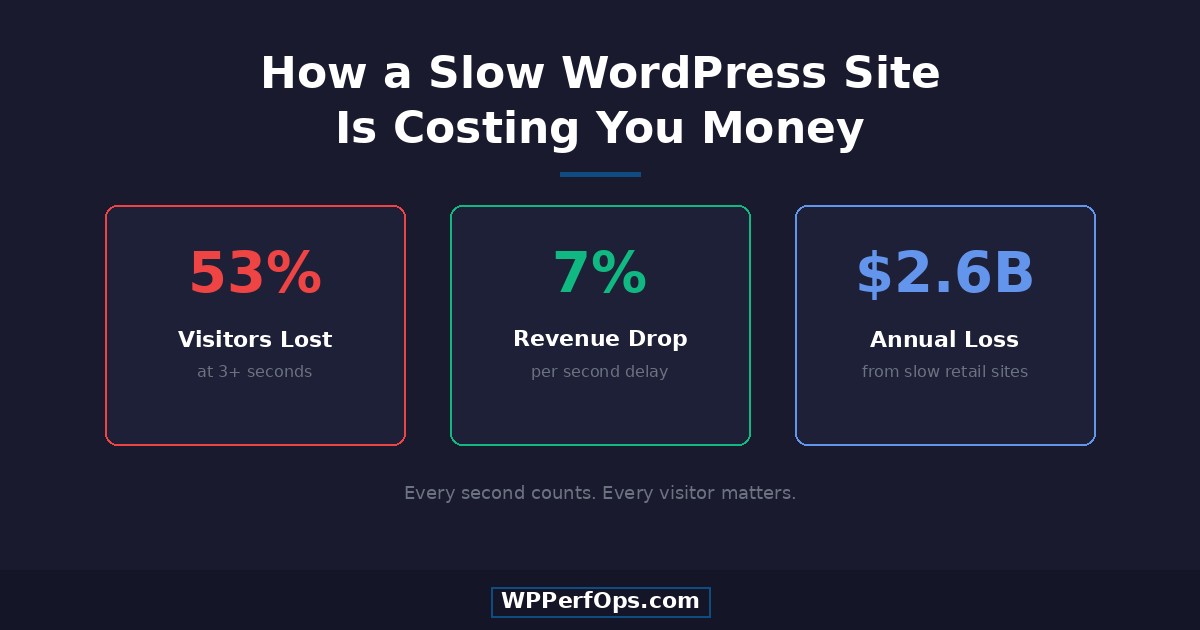
    How a Slow Site Costs Money

    Share this with clients to build the business case for speed optimization investment.

    Read the Article →

  • Why Your Site Gets Slow Again (And How to Prevent Speed Regression)

    Why Your Site Gets Slow Again (And How to Prevent Speed Regression)

    You invested time (or money) getting your WordPress site fast. PageSpeed scores were green, load times were under 2 seconds, and everything felt snappy. Then, three months later, it’s slow again. This isn’t unusual — it’s the norm. WordPress sites naturally regress toward poor performance unless you actively prevent it. This guide explains why it happens and gives you a concrete maintenance routine to stop it.


    Why Speed Regresses

    WordPress is a living system. Unlike a static HTML site that stays exactly how you built it, WordPress changes constantly. Plugins auto-update in the background. Content editors add pages and media. New plugins get installed for “just this one thing.” The database grows with every revision, comment, and session. Each change is small, but they compound — and nobody notices until the site is slow again.

    The root cause is always the same: optimization is treated as a one-time project instead of an ongoing practice. You wouldn’t service your car once and expect it to run perfectly for five years. WordPress performance is the same — it needs regular maintenance to stay healthy.


    Plugin Update Drift

    Plugin developers add features over time. What started as a lightweight 50KB plugin two years ago might now be 200KB with new functionality, additional JavaScript libraries, and more CSS. With WordPress auto-updates enabled, these changes happen without you noticing. One plugin adds 20KB of JS, another adds a new stylesheet, a third introduces a web font — individually negligible, collectively significant.

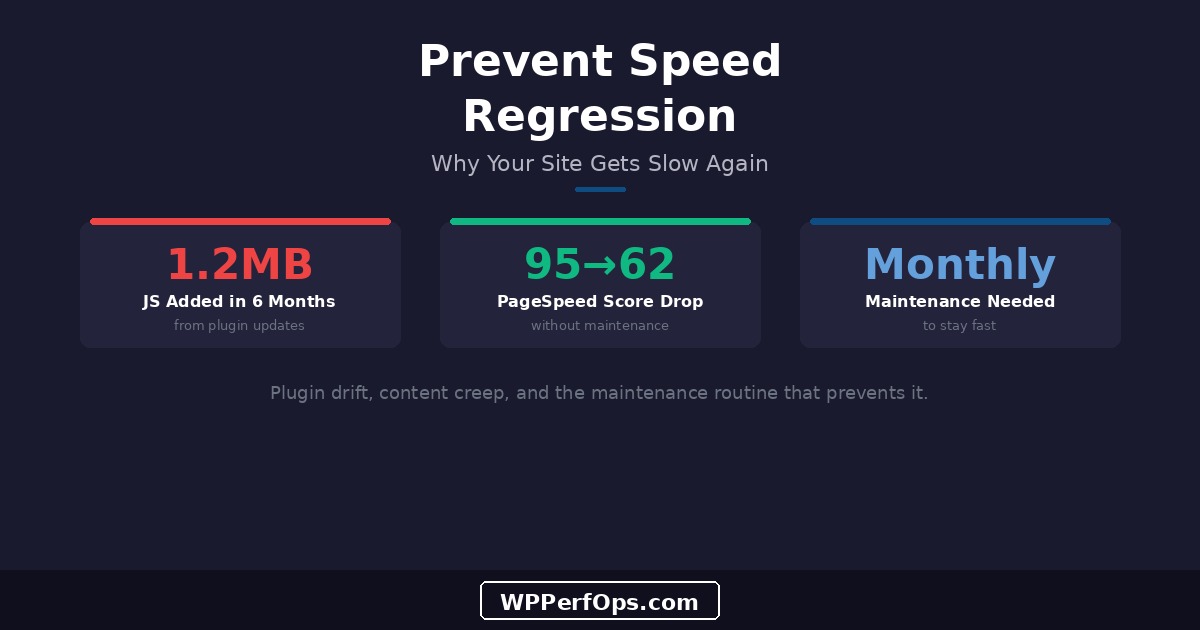
    1.2MB

    Of JavaScript Added in 6 Months — From Plugin Updates Alone

    We tracked one client’s site over six months without any manual changes. The total JavaScript payload grew from 480KB to 1.7MB purely from plugin auto-updates. Three plugins added new features with bundled libraries, one introduced a new analytics module, and another switched from a lightweight carousel to a heavier one. The site owner had no idea — until their PageSpeed score dropped by 25 points.

    The fix isn’t to disable auto-updates (that creates security risks). It’s to monitor total page weight monthly and investigate when it increases. Chrome DevTools Network tab shows exactly how much CSS and JS your pages load — track this number over time.


    Content Creep

    Content editors are focused on creating great content — not on performance. They upload 4MB photos straight from their phone, embed YouTube videos without facades, add social sharing widgets, and install “just one more plugin” for a specific page. None of this is malicious; it’s simply not their job to think about page weight. For best practices on image handling, see our image optimization guide.

    Create an Editorial Image Guide

    Write a one-page guide for your content team: maximum image dimensions (2400px wide), required format (JPEG or WebP, never PNG for photos), maximum file size before upload (500KB), and no embedded videos without approval. Better yet, install an image optimization plugin like ShortPixel that compresses automatically on upload — it’s a safety net for when guidelines get forgotten.


    Database Bloat Over Time

    Without scheduled maintenance, your WordPress database grows continuously. Post revisions accumulate with every edit. Expired transients pile up (especially on WooCommerce sites). Spam comments, even when filtered by Akismet, create database entries. Trashed posts and abandoned drafts linger indefinitely. For a deep dive into database-specific optimizations, see our database optimization guide.

    Database Size Month 1

    45MB

    after initial cleanup

    Database Size Month 12

    380MB

    no maintenance performed


    Configuration Drift

    Optimization settings don’t always survive updates. A caching plugin update might reset your exclusion rules. A theme update could re-introduce render-blocking CSS you’d already addressed. A new plugin might override your carefully configured .htaccess rules. CDN configurations can expire when SSL certificates renew. Each of these resets undoes specific optimization work — and they happen silently.

    The solution: document every optimization change you make. Keep a changelog with the date, what you changed, and why. After any WordPress core update, theme update, or plugin update, spot-check your key configurations: is caching still working? Are your CDN headers correct? Is the critical CSS still being inlined? For a comprehensive list of what to check, use our speed optimization checklist.


    The Monthly Maintenance Checklist

    This routine takes 15–20 minutes per month and prevents the slow drift back to poor performance.

    • Run PageSpeed Insights on 3 key pages (homepage, a blog post, a product/service page) — compare to last month
    • Check total page weight in Chrome DevTools Network tab — flag if it’s increased by more than 100KB
    • Review any new plugins added since last check — do they justify their performance cost?
    • Run database cleanup: delete expired transients, clear spam/trash, limit revisions
    • Verify caching is working: check response headers for cache indicators on key pages
    • Test mobile performance separately — mobile scores often degrade faster than desktop
    • Check Core Web Vitals in Google Search Console — look for any regressions in real user data
    • Review recent plugin updates — any that added significant features (and weight)?

    Quarterly Deep Review

    Every three months, go deeper than the monthly check.

    Full plugin audit. List every active plugin and ask: does this still earn its place? Have better (lighter) alternatives appeared? Are any plugins now redundant because WordPress core has added the same feature? See our mistakes guide for common plugin pitfalls.

    Database size check. Run wp db size --tables --allow-root and compare to the previous quarter. Investigate any tables that have grown significantly.

    Theme and configuration review. Check that your optimization configurations haven’t been reset by updates. Verify critical CSS, font loading, and caching rules are intact.

    Schedule It Like an Oil Change

    Put quarterly performance reviews on your calendar. Treat them as non-negotiable maintenance — not optional housekeeping. The 30 minutes you spend quarterly prevents hours of emergency troubleshooting when your client or boss notices the site is slow again. If you manage multiple sites, see our agency speed management guide for scaling this process.


    Monitoring Tools

    Google Search Console (free) — The Core Web Vitals report shows real-user performance data aggregated over 28 days. This is the single most important monitoring tool because it reflects how Google sees your site. Set up email alerts for performance regressions. For more on what these metrics mean, see our Core Web Vitals guide.

    UptimeRobot (free tier) — Monitors your site’s uptime and response time every 5 minutes. The free tier covers 50 monitors. Set alerts for downtime and for response time exceeding your threshold (e.g., TTFB > 500ms).

    SpeedCurve or Calibre (paid) — For sites where speed directly impacts revenue, these tools provide continuous synthetic monitoring from multiple locations. They track performance budgets, alert on regressions, and show trends over time. Worth the investment for e-commerce and high-traffic content sites.


    When DIY Maintenance Isn’t Enough

    If maintaining speed is taking too much of your time, or if regressions keep happening despite your best efforts, that’s exactly what our Premium plan is designed for. It includes ongoing performance monitoring, monthly optimization maintenance, priority support, and proactive intervention when metrics degrade — so your site stays fast while you focus on running your business. The cost of a slow site far exceeds the investment in ongoing maintenance.

    Check our pricing page for details, or start with a free mini audit to see where your site stands today.


    Keep Learning

    Prevention starts with understanding the fundamentals. These guides cover the optimization work that maintenance protects.

    The Full Framework

    Speed Optimization Checklist

    The 33-step process for optimizing WordPress sites from server to monitoring.

    Read the Checklist →

    Database Layer

    Database Optimization Guide

    Revisions, transients, autoload bloat, and the cleanup routines that keep your database healthy.

    Read the Guide →

    Calculate the Cost

    How a Slow Site Costs You Money

    The business case for speed: why ongoing maintenance is an investment, not a cost.

    Read the Article →

  • How to Choose the Right WordPress Hosting for Speed

    How to Choose the Right WordPress Hosting for Speed

    You’ve optimized your images, cleaned your database, and installed the right caching plugin — but your site still feels sluggish. Before you spend another hour tweaking plugin settings, check the foundation: your hosting. No amount of optimization can compensate for a slow server. This guide breaks down the hosting landscape for WordPress, what actually matters for speed, and how to tell if it’s time to migrate.


    Why Hosting Matters More Than You Think

    Your hosting determines the baseline speed of every single page load. When someone visits your site, the first thing that happens is a request to your server. The server processes PHP, queries the database, assembles the HTML, and sends it back. This is measured as Time to First Byte (TTFB) — and it’s entirely determined by your hosting infrastructure.

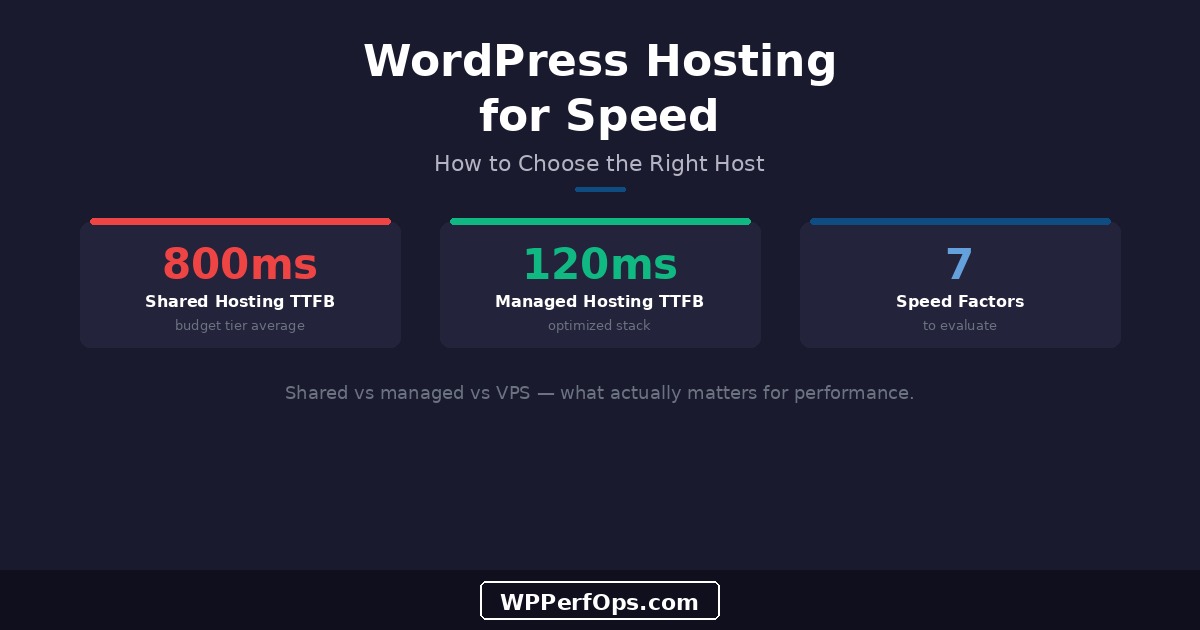
    Good Hosting

    <200ms

    TTFB on managed hosting

    Bad Hosting

    800ms+

    TTFB on shared hosting

    A 600ms difference in TTFB might not sound like much, but it cascades through every metric. Your LCP can’t start until the HTML arrives. Your CLS is affected because layout shifts happen while waiting for content. Google measures TTFB as part of its Core Web Vitals assessment. For more on how these metrics connect, see our Core Web Vitals guide.


    Types of WordPress Hosting

    Shared Hosting ($3–10/month)

    Shared hosting puts hundreds of websites on a single server, sharing CPU, RAM, and bandwidth. It’s the cheapest option and fine for personal blogs with under 1,000 monthly visits. But for business sites, the “noisy neighbor” problem is real: another site on your server running a heavy cron job or getting a traffic spike directly impacts your performance. You have no control over PHP versions, server configuration, or caching infrastructure.

    Managed WordPress Hosting ($25–50/month)

    Managed WordPress hosts (Kinsta, WP Engine, Cloudways, Flywheel) provide WordPress-optimized server stacks with built-in page caching, automatic backups, staging environments, and PHP version management. They handle server maintenance so you focus on your site. For most business sites, this is the sweet spot — predictable performance with minimal technical overhead. Many include a CDN and server-level caching that outperforms any WordPress plugin.

    VPS/Cloud Hosting ($20–80/month)

    Virtual Private Servers on DigitalOcean, Vultr, or Linode give you dedicated resources and full server control. Paired with a management panel like GridPane or SpinupWP, you get managed-hosting convenience with VPS flexibility and often better performance for the price. The tradeoff: more technical knowledge required. Best for developers, agencies managing multiple sites, and sites needing custom server configurations.

    Dedicated Servers ($100+/month)

    An entire physical server dedicated to your site(s). Maximum performance, maximum control, maximum cost. Only necessary for high-traffic sites (100,000+ monthly visits) or applications with specific compliance requirements. If you’re reading this guide, you probably don’t need dedicated hosting — VPS or managed hosting will serve you better at a fraction of the cost.


    The 7 Speed Factors to Evaluate

    When comparing hosts, ignore marketing claims about “blazing fast” or “optimized for WordPress.” Instead, evaluate these seven concrete factors.

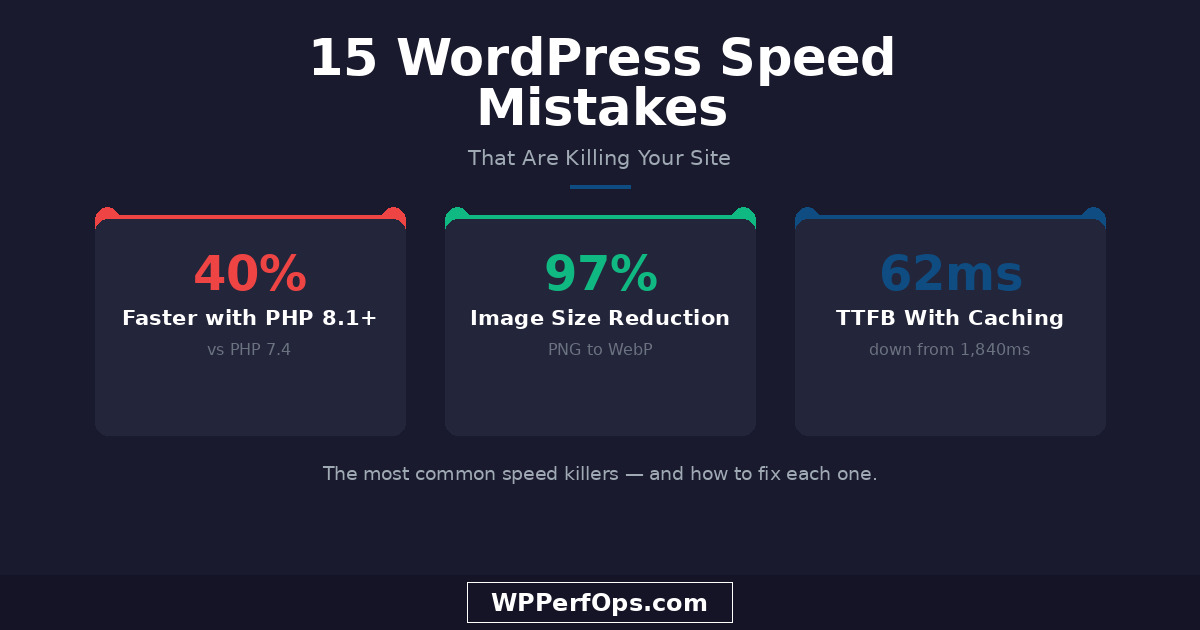
    1. PHP Version Support. Your host must offer PHP 8.2 or higher. PHP 8.2+ is roughly 40% faster than PHP 7.4 at generating pages. If your host doesn’t offer PHP 8.1+, that’s a disqualifying factor. See Mistake 1.

    2. Object Caching (Redis/Memcached). Object caching stores database query results in memory, reducing TTFB by 30–50% for dynamic content. Essential for WooCommerce, membership sites, and any site with logged-in users. Many shared hosts don’t offer this.

    3. Server Location. Choose a server geographically close to your primary audience. A server in Virginia serving visitors in Sydney adds 200–400ms of latency. A CDN helps, but your origin server location still matters for uncached requests.

    4. SSD/NVMe Storage. In 2026, there’s no excuse for spinning disk storage. NVMe SSDs are 5–10x faster than traditional SSDs for random I/O operations. Database queries, which are the primary bottleneck for WordPress, benefit enormously from fast storage.

    5. HTTP/2 or HTTP/3 Support. HTTP/2 multiplexes multiple requests over a single connection, dramatically speeding up page loads with many assets. HTTP/3 (QUIC) goes further with zero-round-trip connections. Both should be standard in 2026.

    6. Built-in CDN or Easy Integration. A CDN serves static assets from edge locations worldwide. Some managed hosts include one (Kinsta uses Cloudflare Enterprise). Others should at least make CDN integration straightforward.

    7. Staging Environments. The ability to test changes before deploying to production. Essential for testing plugin updates, PHP upgrades, and optimization changes without risking your live site.


    What to Look For (and What to Avoid)

    • PHP 8.2+ with easy version switching
    • Redis or Memcached for object caching
    • NVMe SSD storage
    • HTTP/2 or HTTP/3 support
    • Free SSL certificates (Let’s Encrypt)
    • Automatic daily backups with easy restore
    • Staging environment included
    • Server-level page caching (not relying on a WordPress plugin)
    • Brotli compression enabled by default
    • “Unlimited” bandwidth, storage, and websites — a marketing trick that hides resource throttling
    • No control over PHP version (stuck on whatever they provide)
    • No object caching option at any tier
    • No staging environment
    • Support that can’t answer basic performance questions

    The Noisy Neighbor Problem

    500+

    Sites Sharing Your Server on Budget Shared Hosting

    On shared hosting, your site competes for CPU and RAM with hundreds of other sites. When another site gets a traffic spike, runs a heavy backup, or has a misconfigured cron job, your TTFB jumps from 200ms to 2,000ms. You’ll see this as intermittent slowness that’s impossible to reproduce consistently — fast one minute, crawling the next. This unpredictability is the core argument against shared hosting for any business-critical site.


    Managed Hosting: The Sweet Spot for Most Sites

    For business sites, WooCommerce stores, and professional blogs, managed WordPress hosting delivers the best balance of performance, convenience, and cost. You get a WordPress-optimized server stack without needing to manage the server yourself.

    What managed hosts typically include that shared hosting doesn’t: server-level page caching (often Nginx-based, faster than any plugin), automatic PHP version management, Redis object caching, daily backups with one-click restore, staging environments, and WordPress-specific security hardening. The $25–50/month premium over shared hosting pays for itself in time saved and performance gained.

    Migration Is Easier Than You Think

    Most managed WordPress hosts offer free migration as part of onboarding. Kinsta, WP Engine, Cloudways, and Flywheel all have migration tools or dedicated migration teams. You don’t need to deal with database exports, file transfers, or DNS configuration yourself. If hosting is your bottleneck, switching is a solved problem — the hard part is deciding to do it.


    VPS and Cloud: Maximum Control

    For developers and agencies who want full control over the server stack, a VPS on DigitalOcean, Vultr, or Linode paired with a management panel provides the best performance-per-dollar ratio. You get dedicated CPU and RAM (no noisy neighbors), root access, and the ability to configure Nginx, PHP-FPM, Redis, and other server components exactly as needed.

    Server management panels like GridPane, SpinupWP, and RunCloud bridge the gap between raw VPS access and managed hosting convenience. They handle server provisioning, security hardening, automatic updates, and WordPress-specific optimizations while giving you the control to customize everything. For agencies managing 10+ client sites, this approach typically costs less per site than managed hosting while delivering equal or better performance.

    The tradeoff is responsibility: you’re accountable for backups, security patches, and troubleshooting server issues. Management panels handle most of this, but you still need enough technical knowledge to debug problems when they arise. If that sounds like your team, see our agency speed guide for multi-site management strategies.


    How to Test Your Current Hosting

    Before deciding to migrate, measure what you have. These tests take 10 minutes and give you objective data.

    Measure TTFB with curl from your command line or WebPageTest. Run the test 5 times and average the results — single measurements can be misleading due to caching and server load fluctuations.

    Check your PHP version — if you’re below PHP 8.1, that’s an immediate upgrade or migration trigger.

    Test object caching availability — ask your host if Redis or Memcached is available on your plan.

    Monitor uptime for 30 days with UptimeRobot (free tier). Anything below 99.9% uptime is unacceptable for a business site — that’s over 8 hours of downtime per year.

    Quick Server Check with WP-CLI

    Run wp --info to see your PHP version, MySQL version, and WordPress root directory. Run wp eval "echo (extension_loaded('redis') ? 'Redis available' : 'No Redis');" to check for Redis support. These commands give you an instant hosting health snapshot.


    When to Migrate

    Consider migrating if any of these apply to your current hosting:

    • TTFB consistently over 300ms (test 5+ times across different hours)
    • No PHP 8.1+ available (or they charge extra for it)
    • No object caching (Redis/Memcached) at any tier
    • Frequent downtime or 503 errors under normal traffic
    • Support can’t explain why your site is slow
    • No staging environment (you test changes on the live site)

    Migration is a one-time effort that pays dividends for years. If your hosting is the bottleneck, no amount of plugin optimization will compensate. Fix the foundation first, then optimize everything on top of it.


    Keep Learning

    Hosting is the server layer. These guides cover the optimization layers you build on top of it.

    Server-Level Mistakes

    15 WordPress Speed Mistakes

    Mistakes 1–3 cover the server layer in detail — PHP version, object caching, and compression.

    Read the Article →

    Understand the Metrics

    Core Web Vitals for WordPress

    What LCP, INP, and CLS mean, how to measure them, and how TTFB factors into your scores.

    Read the Guide →

    See Real Results

    Our Case Studies

    Real WordPress sites we’ve optimized, with before/after metrics including hosting migration results.

    View Case Studies →

  • WordPress Database Optimization: The Hidden Speed Killer

    WordPress Database Optimization: The Hidden Speed Killer

    You’ve upgraded your hosting, enabled caching, optimized your images, and minified your CSS. Your site should be fast. But something still feels sluggish — pages take a beat too long to generate, admin searches are slow, and your TTFB creeps up under load. The culprit is often hiding in plain sight: your database.

    WordPress databases accumulate bloat silently. Every post revision, every expired transient, every orphaned meta row from a deleted plugin — it all stays in the database unless you actively clean it up. And unlike image weight (which you can see) or JavaScript bloat (which tools flag), database problems are invisible in front-end speed tests. They show up as slow server response times, sluggish admin panels, and TTFB that keeps climbing.

    This guide covers the most common sources of WordPress database bloat and exactly how to fix each one. If you’ve already worked through the hosting and caching mistakes in our speed mistakes guide (especially mistakes 13 and 14), this is the deep dive you need next.


    How WordPress Uses Its Database

    WordPress stores everything in a MySQL database: posts, pages, comments, settings, user data, plugin configurations, and much more. Understanding the key tables helps you identify where bloat accumulates.

    wp_options is the most performance-critical table. Every row with autoload='yes' is loaded into memory on every single page request — before WordPress even starts building the page. Plugins store their settings here, and many set autoload to ‘yes’ by default, whether the data is needed on every request or not.

    wp_posts stores all content: posts, pages, revisions, custom post types, menu items, and WooCommerce products/orders. With unlimited revisions, this table grows linearly with every edit you make.

    wp_postmeta is typically the largest table on any WordPress site. It uses an Entity-Attribute-Value (EAV) pattern — one row per metadata field per post. A single WooCommerce product can have 40+ meta rows. Multiply by thousands of products, and this table balloons.

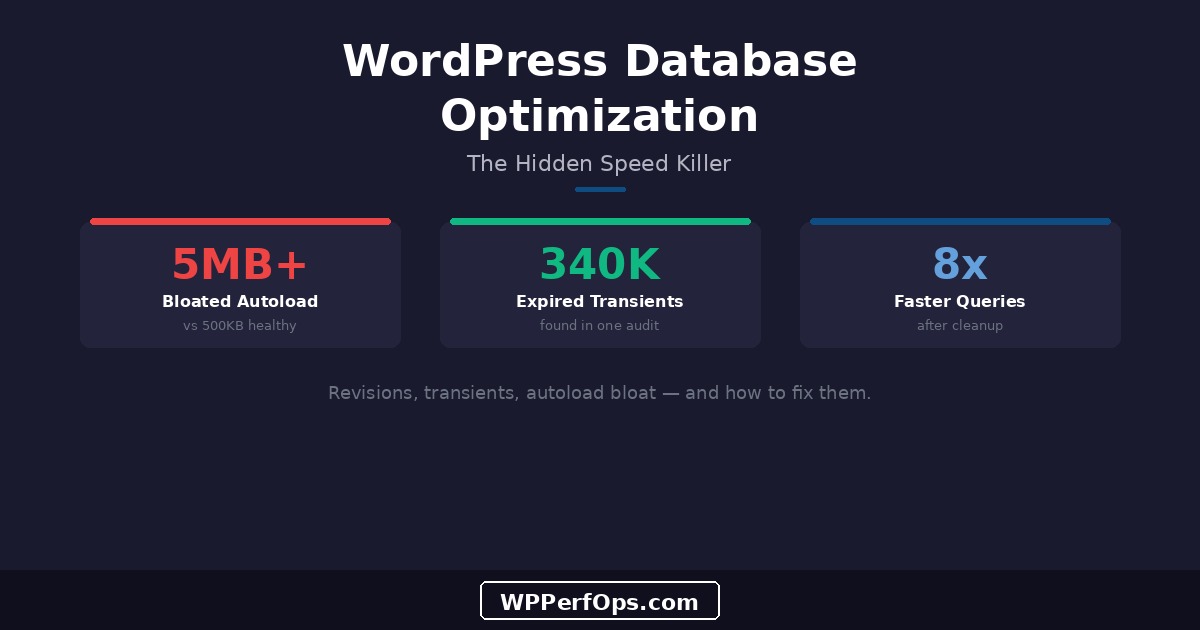
    Healthy Autoload Size

    ~500KB

    well-maintained site

    Bloated Autoload Size

    5MB+

    neglected site with many plugins


    Post Revisions: The Silent Accumulator

    By default, WordPress saves every revision of every post indefinitely. Click “Update” 200 times while editing a blog post, and WordPress stores 200 copies of that post in the database — each with its own set of metadata rows. For a site with 500 posts that have been actively edited, this can mean tens of thousands of unnecessary rows in wp_posts and wp_postmeta.

    The fix is two-part: limit future revisions and clean up existing ones.

    Limit future revisions by adding this line to wp-config.php:

    define('WP_POST_REVISIONS', 5);

    This keeps the 5 most recent revisions per post — enough for rollback without unlimited accumulation.

    Clean existing revisions with WP-CLI:

    wp post delete $(wp post list --post_type=revision --format=ids) --force --allow-root

    Always Back Up First

    Before running any bulk database operations, take a full database backup: wp db export backup.sql --allow-root. Database changes are irreversible. While deleting revisions is safe, cleaning transients or modifying autoloaded options can occasionally break plugin functionality. A backup lets you roll back in seconds if something goes wrong.


    Transients: Temporary Data That Isn’t

    Transients are WordPress’s built-in mechanism for temporary cached data. Plugins use them to store API responses, external data fetches, and computed values with an expiration time. In theory, transients expire and get cleaned up. In practice, WordPress only deletes expired transients when something requests them — meaning expired transients can sit in your database indefinitely if nobody asks for them again.

    340K

    Expired Transients Found in One WooCommerce Audit

    WooCommerce is the worst offender. Every visitor who interacts with the cart gets a wc_session_ transient. On a busy store, these accumulate by the thousands daily. We audited a WooCommerce store that had 340,000 expired session transients — 2.1GB of dead data sitting in wp_options. Since autoloaded options and transients share the same table, this dead weight slowed down every single page request.

    Clean expired transients regularly:

    # Delete only expired transients (safe)
    wp transient delete --expired --allow-root
    
    # Nuclear option: delete ALL transients (they'll regenerate)
    wp transient delete --all --allow-root

    If you have object caching (Redis/Memcached) enabled, transients are stored in memory instead of the database, which eliminates this problem entirely. Yet another reason why object caching is essential for busy sites.


    The Autoloaded Options Problem

    Every row in wp_options with autoload='yes' is loaded into PHP memory on every single page request. This is WordPress’s way of preloading frequently needed data — site URL, active plugins, theme settings — so it doesn’t have to query the database for each one individually. The problem: plugins add autoloaded options liberally and almost never clean them up, even when uninstalled.

    Audit your autoloaded data size:

    SELECT SUM(LENGTH(option_value)) as autoload_size
    FROM wp_options
    WHERE autoload = 'yes';

    Find the biggest offenders:

    SELECT option_name, LENGTH(option_value) as size
    FROM wp_options
    WHERE autoload = 'yes'
    ORDER BY size DESC
    LIMIT 20;

    Over 1MB of Autoloaded Data Is a Red Flag

    A healthy WordPress site typically has 300KB-800KB of autoloaded data. Over 1MB means plugins are storing large serialized arrays, cached API responses, or configuration data that doesn’t need to load on every request. For non-critical options, you can safely set autoload to ‘no’: UPDATE wp_options SET autoload = 'no' WHERE option_name = 'offending_option';. The data will still be available when requested — it just won’t load preemptively on every page.


    Orphaned Metadata

    When you delete a post, WordPress removes the row from wp_posts — but the associated metadata in wp_postmeta often stays behind. The same happens with deleted users (wp_usermeta) and deleted comments (wp_commentmeta). Over years, these orphaned rows accumulate into thousands of useless database entries.

    Identify orphaned post meta:

    SELECT COUNT(*) FROM wp_postmeta
    WHERE post_id NOT IN (SELECT ID FROM wp_posts);

    If the count is significant (thousands or more), clean them up:

    DELETE FROM wp_postmeta
    WHERE post_id NOT IN (SELECT ID FROM wp_posts);

    Apply the same logic to wp_usermeta (checking against wp_users) and wp_commentmeta (checking against wp_comments). Or use WP-Optimize, which handles all of these cleanups through a user-friendly interface.


    wp_postmeta: The Biggest Table Problem

    WordPress’s EAV (Entity-Attribute-Value) pattern for metadata means every piece of information about a post is stored as a separate row. A WooCommerce product might have _price, _regular_price, _sale_price, _sku, _stock_status, _weight, _length, _width, _height, and dozens more — each its own row. With 1,000 products, that’s 40,000+ rows just for product metadata.

    The problem compounds when plugins add their own meta fields. ACF (Advanced Custom Fields) stores every field as post meta. SEO plugins store title, description, and schema data as post meta. Analytics plugins store view counts as post meta. A single post can easily have 50+ meta rows, and querying wp_postmeta with a meta_query requires full table scans unless you have proper indexes.

    Use Query Monitor to identify slow queries hitting wp_postmeta. If you see queries taking 100ms+ on this table, consider adding a custom index for your most-queried meta_key values or migrating to a plugin that uses custom tables (like WooCommerce’s High-Performance Order Storage).

    Query Time Before Cleanup

    1.2s

    Query Time After Cleanup

    0.15s


    Database Maintenance Tools and Routine

    You don’t need to run SQL queries manually every week. These tools automate database maintenance.

    WP-Optimize is the most popular database cleanup plugin. It handles revisions, transients, spam comments, trashed posts, and orphaned data with scheduled automation. Set it to run weekly and forget about it.

    WP-CLI gives you command-line control for scripting and cron jobs:

    # Check database size per table
    wp db size --tables --allow-root
    
    # Optimize all tables (reclaims space)
    wp db optimize --allow-root
    
    # Delete all spam comments
    wp comment delete $(wp comment list --status=spam --format=ids) --force --allow-root

    Query Monitor (the plugin) identifies slow database queries in real-time. Install it temporarily on staging, browse your key pages, and look for queries exceeding 50ms. These are your optimization targets.

    • Weekly: Automated cleanup of expired transients, spam, and trash
    • Monthly: Review database size, check autoloaded data, run wp db optimize
    • Quarterly: Full audit — orphaned meta, revision count, table sizes, slow queries
    • After plugin removal: Check for leftover options and meta rows

    For a broader view of ongoing maintenance, see our guide to preventing speed regression, which covers database maintenance as part of a complete monthly routine.


    Keep Learning

    Database optimization is one layer of a complete speed strategy. These guides cover the other layers.

    The Full Framework

    Speed Optimization Checklist

    33 steps covering every optimization layer, from server to monitoring — organized by impact.

    Read the Checklist →

    Common Mistakes

    15 WordPress Speed Mistakes

    The most common performance mistakes, including two database-specific ones this guide expands on.

    Read the Article →

    Understand the Metrics

    Core Web Vitals for WordPress

    What LCP, INP, and CLS mean, how to measure them, and why Google uses them to rank your site.

    Read the Guide →

  • WordPress Speed Optimization Checklist: A Step-by-Step Framework

    WordPress Speed Optimization Checklist: A Step-by-Step Framework

    Most WordPress speed optimization advice is scattered across dozens of blog posts, each recommending a different plugin, a different setting, a different priority. What’s missing is a systematic framework: what to do first, what to do next, and what order gives you the biggest wins for the least effort. This checklist is the exact 33-step process we follow when auditing WordPress sites professionally.

    The steps are organized by layer — server, caching, theme, images, plugins, database, and monitoring — and ordered by impact within each layer. Start at Step 1 and work your way down. The early steps deliver the biggest gains; the later steps are refinements. If you want the technical foundation behind these steps, read our Core Web Vitals guide, our cost of a slow site analysis, and our 15 common speed mistakes guide.

    Before You Start

    Create a spreadsheet to track your progress. For each step, record the before and after metrics. This does three things: it shows you which changes had the biggest impact, it gives you a rollback reference if something breaks, and it proves the value of your work (to yourself, your boss, or your client). Test with PageSpeed Insights, GTmetrix, and Chrome DevTools — and always test on both mobile and desktop.


    Layer 1: Server & Hosting

    Your server is the foundation. No front-end optimization can overcome a slow server response. These five steps have the highest impact-to-effort ratio of anything on this list.

    PHP Upgrade Impact

    20-40%

    faster page generation

    Object Cache Impact

    30-50%

    faster TTFB

    Step 1: Upgrade PHP to 8.2+. Check your current version under Tools → Site Health → Info → Server. PHP 8.2+ is roughly 40% faster than PHP 7.4 at generating pages. This is the single highest-impact, lowest-effort change available. See Mistake 1.

    Step 2: Enable object caching (Redis or Memcached). Object caching stores database query results in memory. For sites with complex queries — WooCommerce, membership sites, dynamic content — this reduces TTFB by 30-50%. Requires a server that supports Redis/Memcached. See Mistake 2.

    Step 3: Verify GZIP/Brotli compression. Text-based files (HTML, CSS, JS) should be compressed during transfer. Check response headers for content-encoding: br or content-encoding: gzip. If neither appears, your host needs to enable it at the server level.

    Step 4: Check your TTFB. Time to First Byte should be under 200ms for a cached page. Test with curl -o /dev/null -w "%{time_starttransfer}" https://yoursite.com or WebPageTest. If TTFB consistently exceeds 300ms, your hosting may be the bottleneck.

    Step 5: Enable a CDN. A Content Delivery Network serves static assets from edge locations near your visitors. Cloudflare (free tier available), BunnyCDN, or your managed host’s built-in CDN. This reduces latency for visitors far from your server.


    Layer 2: Caching

    Caching is the second-highest-impact optimization. A properly cached site serves pre-built HTML to visitors instead of executing PHP and querying the database on every request.

    Step 6: Install ONE caching plugin. WP Super Cache, W3 Total Cache, LiteSpeed Cache, or WP Rocket. One. Not two, not three. Multiple caching plugins conflict and break your site. See Mistake 7.

    Step 7: Configure page caching with proper exclusions. Exclude cart, checkout, My Account, and any page with user-specific content. Most caching plugins handle WooCommerce exclusions automatically, but verify.

    Step 8: Enable browser caching headers. Set appropriate Cache-Control and Expires headers for static assets (images, CSS, JS). Most caching plugins handle this, but verify with Chrome DevTools → Network → check response headers.

    Step 9: Configure cache preloading. Cache preloading generates cached pages proactively instead of waiting for the first visitor to trigger caching. This ensures the first visitor to any page gets a fast, cached response.

    !

    Verify Caching Is Actually Working

    After configuring caching, verify it’s working. Open an incognito window, load your site, and check the page source for cache indicators (most plugins add an HTML comment like <!-- Cache served by WP Super Cache -->). Also check response headers for X-Cache: HIT. If your pages aren’t being cached, your caching plugin configuration needs troubleshooting.


    Layer 3: Theme & Front-End

    Your theme controls the front-end payload — every CSS file, JavaScript library, and font your visitors’ browsers download.

    Step 10: Audit your theme weight. Open Chrome DevTools → Network, filter by CSS and JS, and add up the total. A well-optimized theme loads 200-400KB of CSS/JS. Multipurpose themes often load 2-4MB. If yours is above 800KB, investigate what’s loading and why.

    Step 11: Remove unused CSS and JavaScript. Use Chrome DevTools Coverage tab to identify unused CSS/JS. Tools like PurgeCSS or plugins like Asset CleanUp can remove unused code. This is often the biggest front-end win.

    Step 12: Defer non-critical JavaScript. JavaScript that isn’t needed for the initial page render should be deferred (defer attribute) or loaded asynchronously (async). Most caching and optimization plugins offer this feature.

    Step 13: Optimize font loading. Self-host fonts locally (don’t load from Google Fonts CDN), limit to 2-3 weights (regular 400, medium 500, bold 700), and set font-display: swap. Preload critical font files with <link rel="preload">. See Mistake 5.

    Step 14: Minimize render-blocking resources. CSS and JavaScript in the <head> blocks rendering until downloaded and parsed. Inline critical CSS (the minimum CSS needed to render above-the-fold content) and defer everything else.

    • Total CSS/JS under 400KB (compressed)
    • No unused CSS loaded on the page (check Coverage tab)
    • Fonts self-hosted with font-display: swap
    • JavaScript deferred or async where possible
    • Critical CSS inlined, rest deferred

    Layer 4: Images & Media

    Images are typically 50-80% of total page weight. For a complete deep-dive, see our image optimization guide. Here are the essential steps.

    Step 15: Convert images to WebP (or AVIF). Install an image optimization plugin (ShortPixel or Imagify) with WebP conversion enabled. WebP delivers 25-34% smaller files than JPEG at the same visual quality.

    Step 16: Implement proper lazy loading. WordPress 5.5+ adds loading="lazy" automatically. Verify it’s working on below-the-fold images. Critical: exclude your hero/LCP image from lazy loading.

    Step 17: Add width and height to all images. Missing dimensions cause Cumulative Layout Shift (CLS). WordPress adds them automatically for editor images, but check custom theme images and any manually coded <img> tags.

    Step 18: Preload your LCP image. Add fetchpriority="high" to your hero image. WordPress 6.3+ does this automatically for the first content image, but verify in your page source.

    Step 19: Optimize video embeds. Replace direct YouTube/Vimeo embeds with facades — static preview images that load the actual player only on click. This prevents loading 1MB+ of third-party scripts on every page view.

    LCP Before Image Opt

    4.2s

    LCP After Image Opt

    1.8s


    Layer 5: Plugins

    Every plugin adds code. The goal isn’t zero plugins — it’s ensuring every plugin earns its place.

    Step 20: Audit all active plugins. List every plugin and ask: does this directly serve my business goals? If the answer is “maybe” or “I’m not sure what it does,” it’s a candidate for removal.

    Step 21: Delete deactivated plugins. Don’t just deactivate — delete. Deactivated plugins clutter your update list, increase your attack surface, and some poorly coded plugins load files even when deactivated. See Mistake 10.

    Step 22: Identify heavy plugins with Query Monitor. Install Query Monitor temporarily and check which plugins are adding the most database queries, the most PHP execution time, and the most HTTP requests. This data-driven approach tells you exactly where to focus.

    Step 23: Replace bloated plugins with lightweight alternatives. Common swaps: replace Contact Form 7 + multiple add-ons with WPForms Lite (or Fluent Forms). Replace Yoast with Rank Math or SEOPress. Replace Jetpack with individual plugins for only the features you use.

    Step 24: Conditionally load plugin assets per page. Use Asset CleanUp or Perfmatters to prevent plugins from loading their CSS and JS on pages that don’t use them. Your contact form plugin doesn’t need to load on every blog post.

    • Social sharing buttons loading on every page (200-400KB of JS)
    • Slider plugins loading on non-slider pages
    • WooCommerce scripts loading on blog posts
    • Multiple analytics scripts instead of consolidated Google Tag Manager

    Layer 6: Database

    Database optimization is often overlooked but delivers consistent gains, especially for older sites. For a deep dive, see our database optimization guide.

    Step 25: Limit and clean post revisions. Add define('WP_POST_REVISIONS', 5); to wp-config.php. Then clean existing revisions: wp post delete $(wp post list --post_type=revision --format=ids) --force --allow-root. See Mistakes 13-14.

    Step 26: Remove expired transients. Run wp transient delete --expired --allow-root. WooCommerce sites are especially prone to transient bloat from customer sessions.

    Step 27: Audit autoloaded options. Query your database: SELECT SUM(LENGTH(option_value)) FROM wp_options WHERE autoload='yes'; Anything over 1MB is a red flag. Find the worst offenders and set non-critical options to autoload='no'.

    Step 28: Clean orphaned metadata. Post meta for deleted posts, user meta for deleted users, and comment meta for deleted comments linger in the database indefinitely. Use WP-Optimize or a targeted SQL query to clean them up.

    Step 29: Schedule regular database maintenance. Use WP-Optimize to schedule weekly cleanups of revisions, transients, trash, and spam comments. Automate this so it doesn’t depend on you remembering.


    Layer 7: Testing & Monitoring

    Optimization without measurement is guesswork. These final steps ensure your improvements stick.

    Step 30: Re-test all Core Web Vitals. After completing the steps above, run PageSpeed Insights on your 3-5 most important pages. Compare to your baseline from Step 1. Document the improvements.

    Step 31: Set up ongoing monitoring. Google Search Console’s Core Web Vitals report tracks real-user performance over time. UptimeRobot (free tier) monitors uptime and response time. Set up both.

    Step 32: Create a monthly maintenance routine. Speed optimization isn’t a one-time project — it’s ongoing. Check page weight monthly, clean the database weekly, audit plugins quarterly. For a complete maintenance framework, see our speed regression prevention guide.

    Step 33: Document everything you changed. Keep a changelog of every optimization: what you changed, when, and the measured impact. If a future update breaks something, this log is your roadmap for debugging.

    Set Calendar Reminders

    Schedule monthly speed checks and quarterly deep reviews on your calendar. Treat performance maintenance like an oil change — skip it, and problems compound silently until something breaks. A 15-minute monthly check prevents hours of emergency troubleshooting later.


    Overwhelmed? That’s Normal.

    33 steps is a lot. The truth is, most site owners get through the first 10-15 steps and see dramatic improvements — then the remaining steps require deeper technical knowledge (server configuration, database queries, conditional asset loading) that goes beyond what a typical site owner should be expected to handle.

    This checklist is the exact process we follow for every client. If you’d rather hand it off to someone who does this every day, our speed optimization service covers every step on this list — plus server-level optimizations that require root access and hosting expertise. Start with a free mini audit to see where your site stands.


    Keep Learning

    Each layer of this checklist has a corresponding deep-dive guide. Start with the areas where your site needs the most work.

    Image Layer Deep-Dive

    Image Optimization Guide

    Formats, compression, responsive images, lazy loading, preloading, and CDN delivery for every image on your site.

    Read the Guide →

    E-Commerce Specific

    WooCommerce Speed Guide

    Cart fragments, caching strategies, product page performance, and database optimization for online stores.

    Read the Guide →

    Understand the Metrics

    Core Web Vitals for WordPress

    What LCP, INP, and CLS mean, how to measure them, and why Google uses them to rank your site.

    Read the Guide →

  • Speed Optimization for WooCommerce: Why Your Store Is Losing Sales

    Speed Optimization for WooCommerce: Why Your Store Is Losing Sales

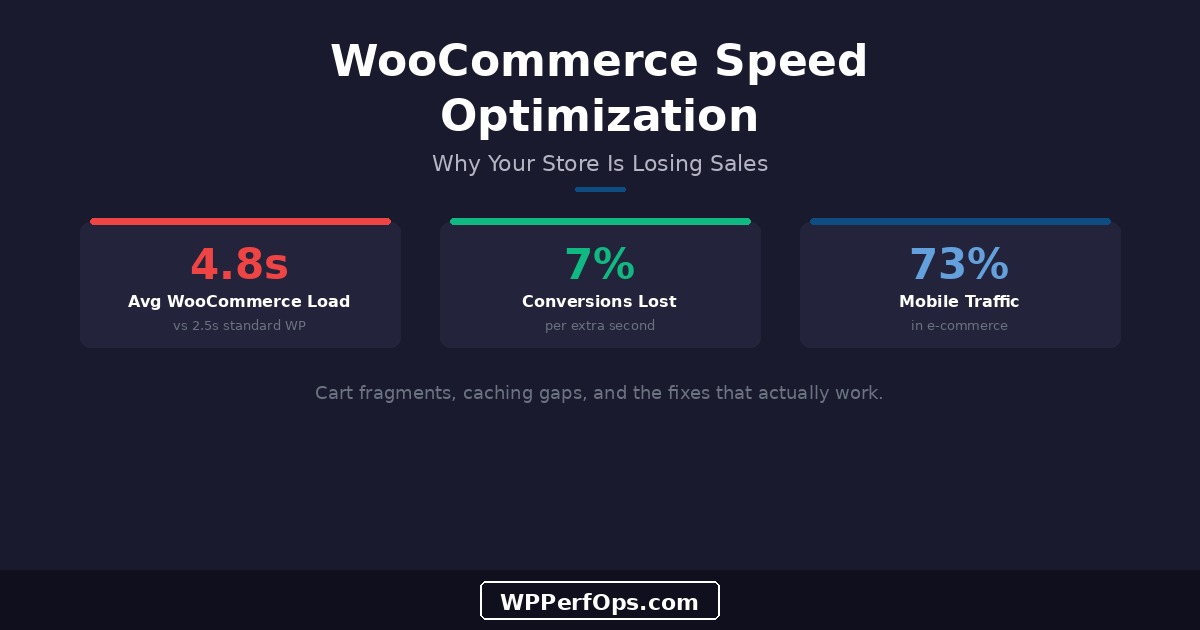
    WooCommerce powers over 28% of all online stores, making it the most popular e-commerce platform on the web. But popularity doesn’t mean performance. The average WooCommerce store loads significantly slower than a standard WordPress site — and every extra second is costing you sales. Research consistently shows that a one-second delay in page load time reduces conversions by 7%. For a store doing $10,000/month, that’s $700 in lost revenue every month from speed alone.

    The frustrating part: WooCommerce has unique performance challenges that generic WordPress speed advice doesn’t address. Logged-in users bypass page caching entirely. Cart fragment AJAX requests fire on every page load. Product pages serve multiple high-resolution images. Database queries multiply with every product variation, review, and order. Standard optimization gets you partway there, but WooCommerce stores need a targeted approach.

    The Business Case for WooCommerce Speed

    Speed isn’t just a technical metric for e-commerce — it’s a revenue lever. We cover the full financial impact of site speed in our cost of a slow site article. The short version: for online stores, the conversion impact is even more dramatic than for content sites because visitors are ready to spend money. A slow checkout doesn’t just frustrate them — it sends them to a competitor.


    Why WooCommerce Is Slower Than Standard WordPress

    A fresh WordPress install with a lightweight theme can achieve sub-second load times easily. Add WooCommerce, and you’re fighting an uphill battle. Here’s why.

    WooCommerce is database-heavy by nature. Every product, variation, attribute, order, customer record, and review lives in the database. A store with 500 products and 10,000 orders has hundreds of thousands of database rows. Every product page triggers queries for pricing, inventory, variations, related products, and reviews — far more than a standard blog post.

    The bigger problem is caching. Page caching — the single most effective WordPress optimization — works by saving a static HTML copy of each page and serving it to visitors without executing PHP or querying the database. But WooCommerce breaks this model for logged-in users. Anyone with items in their cart, anyone on the My Account page, and anyone during checkout is seeing dynamic, user-specific content that can’t be served from a page cache. On a busy store, a significant percentage of your traffic is logged in.

    Avg WordPress Site

    2.5s

    with basic optimization

    Avg WooCommerce Store

    4.8s

    with same optimization


    Product Page Performance

    Product pages are where speed matters most — this is where buying decisions happen. A slow product page doesn’t just frustrate visitors; it actively reduces the perceived value of your product. Here’s what makes product pages heavy and how to fix each issue.

    Product Image Galleries

    Each product typically has 3-8 images: the main product photo, alternate angles, detail shots, lifestyle images, and size/color variations. WooCommerce loads gallery scripts (Flexslider or PhotoSwipe for lightbox), and each image needs a full-size version for zoom functionality. On a product page with 8 images averaging 300KB each, that’s 2.4MB of images alone — before any other content loads.

    Optimize Product Images

    Limit product galleries to 5-6 images maximum — more than that rarely influences buying decisions. Convert all product images to WebP format, compress at 75-80% quality, and ensure gallery thumbnails are properly sized (not full-resolution images scaled down with CSS). For a complete image optimization pipeline, see our image optimization guide.

    Variable Products and AJAX

    Variable products (sizes, colors, materials) trigger AJAX requests when a customer selects a variation. Each selection queries the database for pricing, stock status, and the variation’s unique image. If you have products with 50+ variations (common in apparel), this generates significant server load. Consider using a variation swatches plugin that preloads variation data on page load instead of making individual AJAX calls per selection.

    Related Products and Cross-Sells

    WooCommerce’s related products, upsells, and cross-sells each run additional database queries. The default related products query scans all products sharing the same categories or tags — which can be expensive on large catalogs. If you have 5,000+ products, consider limiting related products to 3-4 items or using a caching-aware related products plugin that pre-computes relationships.


    Cart and Checkout Speed

    Cart and checkout are the most conversion-critical pages on your store. A customer who’s added items to their cart has already decided to buy — a slow checkout is the last barrier between intention and payment.

    Cart Fragments: The #1 WooCommerce Performance Killer

    !

    Cart Fragments Fire an AJAX Request on Every Single Page Load

    WooCommerce uses a feature called “cart fragments” to update the mini-cart widget in your header. It works by making an AJAX POST request to ?wc-ajax=get_refreshed_fragments on every page load — even pages that don’t display a cart widget. This request hits the server (bypassing page cache since it’s a POST), executes WooCommerce’s cart logic, queries the database, and returns the updated cart HTML. On a busy store, this single feature can generate more server load than all your actual page views combined.

    The fix depends on your setup. If you don’t use a mini-cart widget in your header, you can disable cart fragments entirely by dequeuing the wc-cart-fragments script in your theme’s functions.php. If you do use a mini-cart, limit cart fragments to cart and checkout pages only — there’s no reason to refresh the mini-cart on your blog posts or About page. Several performance plugins (like Perfmatters or FlyingPress) offer a one-click toggle for this.

    Checkout Page Optimization

    Your checkout page should be the leanest page on your entire site. Every script, stylesheet, and third-party resource that loads on checkout is a potential barrier to completion.

    • Remove unnecessary form fields — every field adds friction and increases page weight
    • Load payment gateway scripts ONLY on the checkout page, not sitewide
    • Disable live shipping rate calculators if you offer flat-rate or free shipping
    • Defer non-essential scripts (analytics, chat widgets, popups) on checkout
    • Use WooCommerce’s block-based checkout (introduced in WC 8.3+) — it’s lighter than the classic shortcode

    WooCommerce Caching Strategies

    Caching for WooCommerce requires a different approach than standard WordPress caching. You can’t just install a caching plugin and forget it — you need to understand what can be cached, what can’t, and how to handle the gray areas. For a broader look at caching mistakes, see mistake #2 in our speed mistakes guide.

    Page Caching: Know the Limits

    Page caching works great for your shop catalog, category pages, and product pages — for logged-out visitors. But it must exclude cart, checkout, My Account, and any page with personalized content. Most caching plugins handle WooCommerce exclusions automatically, but verify: visit your cart page, check the response headers or page source for cache indicators. If your cart page is being cached, you’ll see stale cart data and broken checkout flows.

    Object Caching: Essential for WooCommerce

    If there’s one optimization that matters more for WooCommerce than anything else, it’s object caching with Redis or Memcached. Object caching stores database query results in memory, so repeated queries (product prices, variation data, cart totals) are served from RAM instead of hitting MySQL. For logged-in users who bypass page cache, object caching is the only caching layer that helps.

    TTFB Without Redis

    450ms

    logged-in user, product page

    TTFB With Redis

    90ms

    same user, same page

    CDN Configuration for WooCommerce

    CDN setup for WooCommerce requires careful cookie handling. Your CDN must be configured to bypass caching for requests containing WooCommerce session cookies (wp_woocommerce_session_*). If your CDN caches a page with a customer’s cart data and serves it to another visitor, you’ll have a serious problem. Most CDN providers have WooCommerce-specific configuration guides — follow them carefully.


    Database Optimization for WooCommerce

    WooCommerce stores generate database bloat at a much faster rate than standard WordPress sites. Every order, every customer session, every product variation creates rows that accumulate over time.

    The wp_postmeta Explosion

    WooCommerce stores product data, order details, and customer information in the wp_postmeta table. A store with 1,000 products and 5,000 orders can easily have 500,000+ rows in this single table. Each meta query requires scanning or indexing this table, and as it grows, queries slow down proportionally. WooCommerce 8.0+ introduced High-Performance Order Storage (HPOS) which moves order data to dedicated tables — if you haven’t migrated yet, this should be a priority.

    Session Transients

    !

    WooCommerce Sessions Can Bloat Your Database by Gigabytes

    Every visitor who adds items to a cart gets a wc_session_ transient stored in the database. On a busy store, these accumulate rapidly. We’ve audited WooCommerce stores with over 340,000 expired session transients occupying 2.1GB of database space. Since wp_options doesn’t have an efficient cleanup mechanism for expired transients, this dead data slows down every autoloaded query. Clean WooCommerce sessions regularly with WP-CLI: wp transient delete --expired.

    Audit Your Database Size

    Use WP-CLI to check your database health: wp db size --tables --allow-root shows the size of every table. If wp_options is over 50MB or wp_postmeta is over 200MB, you likely have significant bloat. For a deep dive into database optimization techniques, see our database optimization guide.


    Plugin Audit for WooCommerce

    WooCommerce stores tend to accumulate plugins faster than any other type of WordPress site. Payment gateways, shipping calculators, inventory management, email marketing, reviews, wishlists, product filters — each adds weight. The key is distinguishing between plugins that are essential for your business and plugins that add convenience at a performance cost.

    • Multiple analytics plugins tracking the same data (Google Analytics + Hotjar + Facebook Pixel each loading their own scripts)
    • Social sharing buttons on product pages (rarely clicked, always loaded)
    • Popup/exit-intent plugins loading on every page including checkout
    • “Speed optimization” plugins that conflict with each other (see Mistake 7)
    • Use Query Monitor to identify the slowest plugins on product and checkout pages
    • Conditionally load plugin scripts only on pages that need them (Asset CleanUp or Perfmatters)
    • Consolidate analytics into Google Tag Manager — one script instead of five
    • Review your plugin list quarterly: does each plugin still justify its performance cost?

    Mobile WooCommerce Performance

    Over 73% of e-commerce traffic now comes from mobile devices. If your store isn’t fast on a phone, you’re losing the majority of your potential customers.

    5x

    Mobile Shoppers Are 5x More Likely to Abandon on Slow Sites

    Mobile users are on slower connections, less powerful processors, and smaller screens where layout shifts are more disruptive. They’re also more likely to be comparison shopping — if your product page takes 5 seconds to load and a competitor’s takes 2, they’re gone. Test your store on real mobile devices, not just Chrome’s mobile emulator, which doesn’t accurately simulate mobile CPU and network constraints.

    Mobile-specific optimizations for WooCommerce include: ensuring add-to-cart buttons have at least 44px touch targets, lazy loading product gallery images below the first image, optimizing product filter interactions for touch (not hover), and serving appropriately sized images via srcset rather than desktop-sized images scaled down with CSS.


    Measuring WooCommerce Speed

    Testing a WooCommerce store requires more nuance than testing a standard WordPress site. You need to measure multiple pages and multiple user states.

    Test logged-out and logged-in separately. Your homepage might score 95 on PageSpeed Insights — but that’s the cached, logged-out version. Test the same page while logged in with items in your cart. The results will be dramatically different, and that logged-in experience is what your actual customers see.

    Test the full shopping journey. Don’t just test your homepage and call it optimized. Test: homepage → category page → product page → add to cart → cart page → checkout. Each step has different performance characteristics. Use WebPageTest’s multi-step scripting to automate this flow.

    Use Query Monitor for server-side insights. Query Monitor shows you exactly how many database queries each page runs, which plugins are adding load, and where time is being spent on the server. For a product page making 400+ database queries, this is the fastest way to identify what to optimize. Cross-reference with your Core Web Vitals to get the full picture.

    Monitor real user data, not just lab tests. Google Search Console’s Core Web Vitals report shows how real visitors experience your store. Lab tests (Lighthouse, PageSpeed Insights) simulate ideal conditions. Real users are on 3G connections, older phones, and in geographic locations far from your server. Both perspectives matter.


    Keep Learning

    WooCommerce speed optimization builds on the fundamentals of WordPress performance. These resources cover the foundation.

    Revenue Impact

    How a Slow Site Costs You Money

    The complete business case for speed: conversion rates, bounce rates, and the revenue you’re losing every month.

    Read the Article →

    Optimize Images

    WordPress Image Optimization Guide

    The complete pipeline for product images: formats, compression, responsive images, and delivery optimization.

    Read the Guide →

    See Real Results

    Fashion E-Commerce Case Study

    How we optimized a WooCommerce fashion store — with before/after metrics and the specific changes that made the difference.

    View Case Study →

  • The Complete WordPress Image Optimization Guide: From Upload to WebP

    The Complete WordPress Image Optimization Guide: From Upload to WebP

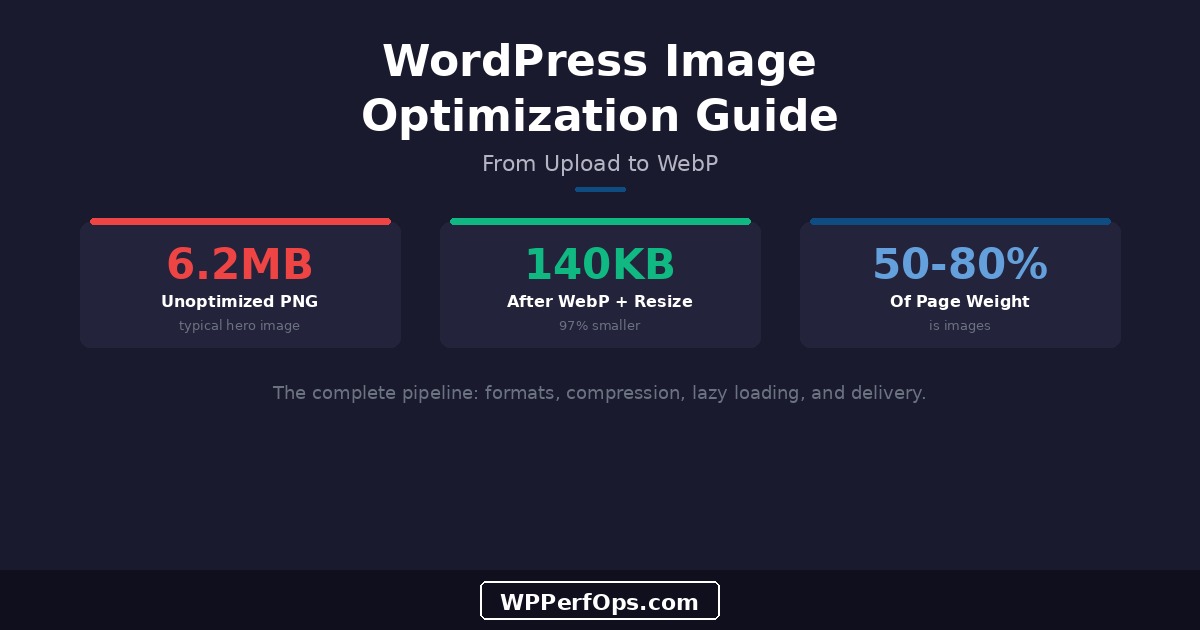
    Images account for 50-80% of a typical WordPress page’s total weight. That single stat explains why image optimization is consistently the highest-ROI speed improvement for most sites. You can upgrade your hosting, fine-tune your caching, and minify every CSS file — but if your hero image is a 4MB PNG, none of that matters. Your Largest Contentful Paint will still be measured in seconds, not milliseconds.

    The good news: image optimization has a clear, repeatable pipeline. Choose the right format, size images to their actual display dimensions, compress them intelligently, deliver them efficiently, and handle lazy loading correctly. This guide walks through each step — with specific tools, settings, and WordPress-specific techniques that work in 2026.

    Why Images Matter for Core Web Vitals

    Your hero image is almost always the Largest Contentful Paint (LCP) element — the metric Google weighs most heavily for page experience. Unoptimized images also cause Cumulative Layout Shift (CLS) when they lack dimensions. If you’re not familiar with these metrics, read our Core Web Vitals guide first. For a list of common image-related mistakes, see our 15 WordPress speed mistakes guide (mistakes 6, 8, and 11).


    Understanding Image Formats

    Not all image formats are created equal. The format you choose determines both the file size and quality ceiling for every image on your site. Here’s what you need to know about each option in 2026.

    JPEG: The Reliable Workhorse

    JPEG has been the web standard for photographs since the 1990s, and it’s still a solid choice. It handles photographic content well with lossy compression, but it doesn’t support transparency and its compression algorithm is showing its age. JPEG is your fallback format — the one that works everywhere, including very old browsers.

    PNG: When You Need Transparency

    PNG uses lossless compression, which means pixel-perfect quality but significantly larger file sizes. Use PNG only when you genuinely need transparency (logos, icons, overlays). For photographs, PNG files are typically 5-10x larger than JPEG at comparable visual quality. We still see sites serving full-page hero images as PNGs — that’s almost always a mistake.

    WebP: The Modern Standard

    WebP is where you should be in 2026. Developed by Google, it delivers 25-34% smaller files than JPEG at equivalent visual quality, supports both lossy and lossless compression, and handles transparency. Browser support is now universal — every modern browser including Safari (since version 14) supports WebP. There’s no reason not to use it as your primary format.

    AVIF: The Future (Almost Here)

    AVIF pushes compression even further — typically 30-50% smaller than WebP. It’s based on the AV1 video codec and produces impressive results, especially at low file sizes where JPEG shows visible artifacts. The catch: browser support is still growing (Chrome, Firefox, and Safari 16.4+ support it, but encoding is slow and some older mobile browsers don’t). Use AVIF as a progressive enhancement with WebP or JPEG fallback, not as your only format.

    Same Photo as JPEG

    180KB

    Same Photo as WebP

    120KB

    Same Photo as AVIF

    85KB


    Responsive Images and srcset

    One of the most common image mistakes is serving a single large image to every device. A 2048px-wide hero image makes sense on a desktop monitor, but a phone with a 390px-wide screen doesn’t need — and shouldn’t download — all those extra pixels. That’s where responsive images come in.

    WordPress has built-in responsive image support since version 4.4. When you upload an image, WordPress automatically generates multiple sizes: 150px (thumbnail), 300px (medium), 768px (medium-large), 1024px (large), 1536px, and 2048px (full). It then adds srcset and sizes attributes to <img> tags, telling the browser which version to download based on the viewport width. The browser picks the smallest image that still looks sharp for the user’s screen.

    !

    Uploading Oversized Source Images Defeats the Purpose

    If your site’s content area is 1200px wide, there’s no reason to upload a 5000px image from your camera. WordPress will generate the intermediate sizes, but the original 5000px version still lives in your media library, wasting storage and sometimes getting served to high-DPI screens. Before uploading, resize your source images to a maximum of 2x your largest display size — so 2400px for a 1200px content area. This keeps srcset efficient and prevents unnecessarily large downloads.

    How to Audit Your Actual Display Sizes

    Open Chrome DevTools (F12), hover over an image, and look at the tooltip. It shows both the intrinsic size (the actual file dimensions) and the rendered size (how large it appears on screen). If you see “Intrinsic: 3000×2000” and “Rendered: 800×533,” that image is downloading 14x more pixels than needed. Your image optimization plugin should be generating a size close to the rendered dimensions for each breakpoint.

    If your theme uses custom layout widths, you may want to register custom image sizes in your theme’s functions.php using add_image_size(). This ensures WordPress generates versions that match your actual display contexts — for example, a 780px hero width or a 400px card thumbnail — rather than relying solely on the default sizes.


    Compression: Lossy vs Lossless

    Compression is where the real savings happen. Even after choosing the right format and dimensions, intelligent compression can cut file sizes by another 50-80% with virtually no visible quality loss.

    Lossy Compression: The Smart Default

    Lossy compression discards image data that the human eye can’t easily perceive. At quality levels of 60-80% (depending on the tool), the visual difference between the original and compressed version is imperceptible to most people, but the file size drops dramatically. A 500KB JPEG at quality 80 looks identical to the full-quality version on screen but saves 60% of the bandwidth.

    For web images, lossy compression at 75-82% quality is the sweet spot. Below 60%, you’ll start seeing visible artifacts — banding in gradients, halos around text, and mushy details. Above 85%, you’re paying a significant file size premium for quality improvements that nobody can see on a screen.

    Lossless Compression: For Specific Use Cases

    Lossless compression reduces file size without discarding any data. The quality is identical to the original, but the savings are much smaller — typically 10-30% instead of 60-80%. Use lossless for screenshots, diagrams, and technical illustrations where every pixel matters. For photographs, it’s rarely worth the tradeoff.

    WordPress Image Optimization Plugins

    You don’t need to manually compress every image. These plugins handle it automatically on upload and can bulk-optimize your existing media library:

    ShortPixel — Our top recommendation. Excellent compression quality, WebP/AVIF conversion, and a generous free tier (100 images/month). The “Glossy” preset is ideal for web use — lossy compression that’s visually indistinguishable from the original.

    Imagify — Made by the WP Rocket team. Strong compression with an intuitive interface. The “Aggressive” mode delivers great results for most sites. More expensive than ShortPixel at scale.

    Smush — Popular free option from WPMU DEV. The free version is limited (lossless only, 5MB max per image, no WebP without Pro). Fine for small sites, but you’ll quickly hit the limits on anything larger.

    EWWW Image Optimizer — Does compression locally on your server instead of sending images to a cloud API. Good for privacy-sensitive sites, but requires more server resources and the compression isn’t quite as aggressive as cloud-based tools.

    Before Optimization

    2.4MB

    total page image weight

    After Optimization

    380KB

    84% reduction, same visual quality

    Don’t forget your existing media library. Most optimization plugins offer a bulk optimization feature that processes all previously uploaded images. If you have thousands of images, run this during low-traffic hours — it’s CPU-intensive but worth the one-time effort.


    Lazy Loading Done Right

    Lazy loading defers the download of off-screen images until the user scrolls near them. Instead of loading all 25 images on a page at once, the browser loads only the 2-3 that are visible and fetches the rest on demand. This dramatically reduces initial page weight and speeds up the first meaningful paint.

    WordPress has included native lazy loading since version 5.5, automatically adding loading="lazy" to images and iframes. In most cases, this works well out of the box. But there’s one critical mistake that we see on nearly every site we audit.

    !

    Never Lazy Load Your Hero Image

    Your above-the-fold hero image is almost always your Largest Contentful Paint (LCP) element. Lazy loading it tells the browser to deprioritize the single most important visual element on your page. The result: your LCP score tanks. WordPress 6.3+ automatically skips lazy loading on the first image in post content, but custom themes and page builders often override this. Check your hero image’s HTML — if you see loading="lazy" on it, remove it and add fetchpriority="high" instead.

    • Lazy loading the hero/LCP image (delays the most important visual element)
    • Lazy loading images that are above the fold on mobile (smaller viewport shows fewer images)
    • Using a JavaScript-based lazy loader when native loading="lazy" works fine
    • Let WordPress handle lazy loading natively for below-the-fold images
    • Add fetchpriority="high" to your hero image for faster LCP
    • Lazy load iframes (YouTube, Google Maps) — they’re often the heaviest embeds on a page
    • Use video facades (static preview images) for embedded video players

    Preloading Critical Images

    While lazy loading delays non-critical images, preloading does the opposite — it tells the browser to start downloading your most important image immediately, before it even parses the HTML that references it. For your LCP image, this can shave hundreds of milliseconds off your load time.

    The technique uses a <link rel="preload"> tag in your page’s <head>:

    <link rel="preload" as="image" href="/wp-content/uploads/hero.webp" type="image/webp">

    WordPress 6.3 introduced automatic LCP image preloading using the fetchpriority="high" attribute. In WordPress 6.5+, the system goes further by adding a <link rel="preload"> for the featured image when it’s likely the LCP element. If your theme properly uses the_post_thumbnail() or the block editor’s image block, this works automatically.

    Test With Lighthouse

    Run a Lighthouse audit in Chrome DevTools and look for the “Preload Largest Contentful Paint image” opportunity. If it appears, your LCP image isn’t being preloaded and you’re leaving performance on the table. Lighthouse will even show you the exact URL to preload. Also check that your LCP image has fetchpriority="high" and does NOT have loading="lazy".

    A word of caution: only preload 1-2 images maximum. Preloading too many resources defeats the purpose — you’re telling the browser everything is high priority, which means nothing is. Reserve preloading for your actual LCP image, not decorative elements or below-the-fold content.


    CDN and Image Delivery

    A Content Delivery Network (CDN) serves your images from servers geographically close to your visitors. Instead of every request traveling to your origin server (which might be in Virginia while your visitor is in Tokyo), the CDN serves a cached copy from a nearby edge location. The result: dramatically lower latency for image downloads.

    !

    Without a CDN, Every Visitor Hits Your Origin Server

    If your server is in New York and a visitor in Sydney requests a 200KB hero image, that data travels ~16,000 km. Add in TCP connection overhead, TLS handshake, and the physical speed of light through fiber, and you’re looking at 200-400ms of latency before the first byte even arrives. A CDN with an Australian edge location reduces that to under 30ms. Multiply that by every image on the page, and the savings are substantial.

    Traditional CDN vs Image CDN

    A traditional CDN (Cloudflare, BunnyCDN, KeyCDN) caches and serves your existing image files as-is. You still handle optimization, resizing, and format conversion yourself — the CDN just delivers them faster.

    An image CDN (Cloudflare Polish/Image Resizing, imgix, Cloudinary) goes further: it resizes, compresses, and converts images on-the-fly at the edge. You upload one high-quality source image, and the CDN automatically serves the optimal version for each visitor’s device, browser, and connection speed. This is the most hands-off approach — you upload images and forget about format conversion and responsive sizing.

    For most WordPress sites, a traditional CDN combined with a good image optimization plugin (ShortPixel or Imagify) is the most practical setup. Image CDNs add complexity and cost that’s better suited for high-traffic sites with thousands of images.


    WordPress-Specific Image Settings

    Beyond general image optimization, WordPress has several settings and features that directly affect image performance.

    Review Your Media Settings

    Under Settings → Media, WordPress defines three default image sizes: Thumbnail (150×150), Medium (300×300), and Large (1024×1024). These are the intermediate sizes generated on upload. If your theme never uses the 150×150 thumbnail, that’s wasted storage and processing time for every image. Conversely, if your theme needs a 600px card image and the closest default is 300px, WordPress will serve the larger 1024px version — wasting bandwidth.

    Audit which sizes your theme actually uses and adjust accordingly. You can also disable unused sizes by setting their dimensions to 0 in Media settings, or by hooking into intermediate_image_sizes in your theme.

    Featured Image Best Practices

    Your featured image appears on archive pages, social media shares, and often as the hero image on the post itself. Optimize it aggressively:

    • Use 1200x630px for optimal social media display (matches Open Graph recommendations)
    • Compress to WebP at 75-80% quality — aim for under 100KB
    • Ensure your theme adds fetchpriority="high" when displaying the featured image as a hero
    • Use wp_get_attachment_image() instead of raw <img> tags to get automatic srcset and lazy loading

    WooCommerce Product Images

    E-commerce sites face unique image challenges: multiple product photos per item, zoom functionality requiring high-resolution originals, and gallery lightboxes that load several large images at once. WooCommerce product images deserve their own optimization strategy — we cover this in depth in our WooCommerce speed optimization guide. The short version: limit gallery images to 5-6 per product, use WebP, and configure WooCommerce’s built-in image regeneration after changing thumbnail sizes.


    Your Image Optimization Checklist

    Here’s the complete checklist. Work through it top to bottom — the items are ordered by impact.

    • Install an image optimization plugin (ShortPixel or Imagify) with WebP conversion enabled
    • Bulk-optimize existing images in your media library — don’t just optimize new uploads
    • Resize source images before uploading — maximum 2x your largest display width
    • Set compression to lossy at 75-82% quality (ShortPixel “Glossy” or Imagify “Aggressive”)
    • Verify lazy loading is working on below-the-fold images (check for loading="lazy")
    • Confirm your hero image is NOT lazy loaded — remove loading="lazy" and add fetchpriority="high"
    • Add width and height attributes to all images to prevent CLS
    • Enable a CDN for faster global image delivery
    • Use video facades for YouTube and Vimeo embeds
    • Audit unused image sizes in your Media settings and disable them
    • Test with Lighthouse — look for “Properly size images” and “Serve images in next-gen formats”

    Keep Learning

    Image optimization is one of the most impactful pieces of WordPress performance, but it’s not the whole picture. These resources cover the bigger performance landscape.

    Understand the Metrics

    Core Web Vitals for WordPress

    Learn what LCP, INP, and CLS mean, how to measure them, and why Google uses them to rank your site.

    Read the Guide →

    Avoid Common Pitfalls

    15 WordPress Speed Mistakes

    The most common performance mistakes we see on WordPress sites — including three image-specific ones this guide expands on.

    Read the Article →

    Calculate the Cost

    How a Slow Site Costs You Money

    The business case for speed: conversion rates, bounce rates, and the real revenue impact of every extra second.

    Read the Article →

  • 15 WordPress Speed Mistakes That Are Killing Your Site (And How to Fix Them)

    15 WordPress Speed Mistakes That Are Killing Your Site (And How to Fix Them)

    You’ve installed a caching plugin, optimized a few images, maybe even upgraded your hosting — and your site is still slow. Sound familiar? Here’s the thing: WordPress performance isn’t about one silver bullet. It’s about a stack of small mistakes that compound into a serious problem. Each one shaves off a few hundred milliseconds, adds a few extra requests, or bloats your page by another 200KB. Individually, they seem minor. Together, they’re why your site takes five seconds to load instead of two.

    After auditing hundreds of WordPress sites, we see the same 15 mistakes over and over. This guide walks through each one — what it is, why it matters, and exactly how to fix it. Some are five-minute fixes. Others need a bit more expertise. But all of them are fixable.

    New to Performance Metrics?

    Before diving into these mistakes, it helps to understand what Google actually measures. Read our Core Web Vitals guide first for the full picture of LCP, INP, and CLS — the three metrics that directly impact your search rankings.


    The Hosting & Server Layer

    Your server is the foundation. No amount of front-end optimization can overcome a slow server response. These three mistakes happen before your site’s HTML even reaches the browser.

    Mistake 1: Running an Outdated PHP Version

    PHP is the engine that powers WordPress. Each major version brings significant performance improvements — PHP 8.1+ is roughly 40% faster at generating pages than PHP 7.4. Yet we still see sites running PHP 7.4 or even 7.2. That’s like running a race with ankle weights.

    Check your PHP version under Tools → Site Health → Info → Server in your WordPress dashboard. If you’re below 8.1, contact your host to upgrade. Most managed hosts let you switch PHP versions with a single click. Just test your site afterward — some older plugins may need updates to be compatible.

    The Fix

    Upgrade to PHP 8.2 or 8.3 through your hosting control panel. If you’re on shared hosting that doesn’t offer PHP 8.1+, that’s a sign it’s time to upgrade your hosting environment. This is one of the highest-impact, lowest-effort changes you can make.

    Mistake 2: Skipping Object Caching

    Most WordPress sites have page caching, but very few use object caching. Here’s the difference: page caching saves the entire finished HTML page. Object caching saves individual database query results in memory (Redis or Memcached) so WordPress doesn’t have to re-query the database for the same data on every request. For database-heavy sites — WooCommerce stores, membership sites, dynamic content — this is transformative.

    2

    Without Object Caching, Every Request Hits Your Database

    Logged-in users bypass page caching entirely. Without object caching, every admin session, every WooCommerce cart interaction, and every membership check triggers fresh database queries. On busy sites, this creates a bottleneck that no amount of page caching can solve.

    TTFB Without Object Cache

    300ms

    TTFB With Redis

    80ms

    Mistake 3: No GZIP or Brotli Compression

    Text-based files — HTML, CSS, JavaScript — are highly compressible. Without compression, your server sends them at full size. With Brotli compression (the modern successor to GZIP), a 400KB page can shrink to around 80KB. That’s an 80% reduction in transfer size, which directly speeds up how fast the browser can download and start rendering your page.

    3

    Most Hosts Enable This by Default — But Not All

    Test yours at tools.keycdn.com/http2-test or check response headers for content-encoding: br (Brotli) or content-encoding: gzip. If neither appears, your host needs to enable it at the server level — this is not something a WordPress plugin can reliably handle.


    Theme & Design Mistakes

    Your theme is the single biggest chunk of front-end code your site loads. A poorly chosen or misconfigured theme can add megabytes of unnecessary weight to every page.

    Mistake 4: Using a “Do Everything” Multipurpose Theme

    4

    Multipurpose Themes Load 2–4MB of Assets You’ll Never Use

    Those “500+ demos, unlimited layouts” themes come with a cost: they load CSS and JavaScript for every feature they offer, whether you use them or not. Sliders, mega menus, animation libraries, icon font sets — all bundled into every page. A lightweight block theme loads 300–800KB total. That difference alone can cut your LCP in half.

    If redesigning isn’t an option right now, at minimum disable unused theme features and use a plugin like Asset CleanUp to prevent unnecessary CSS/JS from loading on pages that don’t need them.

    Mistake 5: Loading Custom Fonts Incorrectly

    Custom fonts are one of the biggest hidden performance drains. Loading them from Google Fonts adds an extra DNS lookup and external request. Loading too many weights and styles (regular, italic, bold, bold italic, light, thin…) multiplies the problem. And without font-display: swap, visitors see invisible text until the font loads — a terrible experience.

    How to Load Fonts the Right Way

    • Loading from Google Fonts CDN (extra DNS + connection overhead)
    • Using 5+ font weights/styles when you only need 2–3
    • Missing font-display: swap (causes invisible text flash)
    • Self-host fonts locally (eliminates external requests)
    • Limit to 2–3 weights: regular (400), medium (500), bold (700)
    • Always set font-display: swap and preload critical font files

    Mistake 6: Missing Image Dimensions

    When images don’t have explicit width and height attributes, the browser doesn’t know how much space to reserve. As each image loads, the page jumps and shifts — text moves, buttons relocate, and users accidentally click the wrong thing. This is Cumulative Layout Shift (CLS), and it’s one of the three Core Web Vitals that directly affects your search rankings.

    6

    Every Image Without Dimensions Causes Layout Shift

    WordPress 5.5+ automatically adds width and height attributes to images inserted through the editor. But custom themes, page builders, and manually coded images often omit them. Audit your pages with Chrome DevTools — any image missing dimensions is a CLS contributor.

    CLS Before Fix

    0.28

    Poor — failing threshold

    CLS After Fix

    0.04

    Good — passing easily


    Plugin & Code Mistakes

    Plugins are the double-edged sword of WordPress. They extend functionality, but each one adds code that your server has to execute and your visitors’ browsers have to download. The biggest gains often come not from adding another optimization plugin, but from removing the bloat you already have.

    Mistake 7: Installing Too Many “Speed” Plugins

    7

    More Speed Plugins ≠ More Speed

    We regularly audit sites running three caching plugins, two image optimizers, a CSS minifier, and a JavaScript defer plugin — all conflicting with each other. The result? Broken pages, duplicate processing, and a site that’s actually slower than having no optimization at all. Pick one caching plugin and one asset optimization plugin. That’s it. In one recent audit, removing five redundant optimization plugins made the site 1.8 seconds faster.

    Mistake 8: Not Lazy Loading Images and Videos

    Lazy loading defers the download of images and videos that are below the fold — outside the visitor’s initial viewport. Instead of loading all 30 images on a page at once, the browser only loads the ones that are visible and fetches the rest as the user scrolls down. This dramatically reduces initial page weight and speeds up the first meaningful paint.

    Lazy Loading Done Right

    WordPress 5.5+ adds native lazy loading (loading="lazy") to images automatically. But here’s the critical mistake: don’t lazy-load your hero image. Your above-the-fold hero image is almost always your Largest Contentful Paint element — lazy loading it forces the browser to wait, which directly hurts your LCP score. Exclude the first 1–2 images from lazy loading, and add fetchpriority="high" to your hero image instead.

    Mistake 9: External Scripts and Social Widgets

    9

    Third-Party Scripts Are the Silent Performance Killers

    A Facebook Like Box widget loads over 500KB of JavaScript. Disqus comments: 1MB+. Each embedded tweet, Instagram post, or YouTube video without a facade pulls in its own set of scripts and stylesheets. These external resources are outside your control — they can slow down, get blocked, or add latency from distant servers. Delay non-critical third-party scripts until after page load, use facades (static previews that load the real embed on click), and consolidate analytics tags into Google Tag Manager.

    Mistake 10: Keeping Inactive Plugins Installed

    “I might need it later” is how you end up with 35 plugins, 20 of them deactivated. While deactivated plugins don’t execute code on the front end, they still clutter your update list, increase your attack surface for security vulnerabilities, and some poorly coded plugins can even load files when deactivated. More importantly, the mindset of keeping everything “just in case” usually means active plugins aren’t being audited either.

    • Deactivating plugins but leaving them installed “just in case”
    • Running plugins that duplicate WordPress core features (like SEO plugins that also do sitemaps when your host already provides them)
    • Keeping plugins for one-time tasks (migration, data import) after the job is done
    • Delete plugins you don’t actively use — don’t just deactivate
    • Audit your plugin list quarterly: does each plugin still earn its place?
    • Check if newer WordPress core features have replaced plugins you installed years ago

    Image & Media Mistakes

    Images typically account for 50–80% of a page’s total weight. Getting image optimization right is often the single biggest performance win available. These two mistakes are responsible for more slow sites than almost anything else.

    Mistake 11: Uploading Unoptimized Full-Size Images

    11

    A Single Unoptimized Image Can Ruin Your LCP

    We’ve seen hero images uploaded at 6.2MB as full-resolution PNGs straight from a design tool. After converting to WebP and resizing to the actual display dimensions, that same image becomes 140KB — a 97% reduction. This single change can knock seconds off your load time. Use an image optimization plugin like ShortPixel or Imagify to automatically compress and convert uploads, and always resize images to the maximum display size before uploading.

    LCP Before Optimization

    6.8s

    6.2MB hero image (PNG)

    LCP After Optimization

    2.1s

    140KB hero image (WebP)

    Need help optimizing your entire media library? Our optimization service includes bulk image compression, WebP conversion, and proper responsive image configuration as part of every engagement.

    Mistake 12: Not Using a CDN

    Your server has a physical location. If it’s in New York and a visitor is in Tokyo, every request travels across the Pacific Ocean and back. That’s 200–400ms of latency added to every single asset — images, CSS, JavaScript, fonts. Multiply that by 20–30 requests and you’re looking at seconds of added load time for international visitors.

    CDN Options for Every Budget

    A Content Delivery Network copies your static assets to servers worldwide. Cloudflare offers a generous free tier that includes CDN, DNS, and basic DDoS protection. BunnyCDN is excellent value for bandwidth-heavy sites. Many managed WordPress hosts include a CDN. There’s no reason not to use one — the performance benefit is immediate and the cost is often zero.


    Database & Backend Mistakes

    Your database is where WordPress stores everything — posts, pages, options, user data, plugin settings, transient caches, and revision history. Over time, it accumulates bloat that slows down every query. These last three mistakes address the backend problems that caching plugins can mask but never truly fix.

    Mistake 13: Never Cleaning the Database

    13

    Your Database Is Probably 5x Bigger Than It Needs to Be

    A site with 200 blog posts might have 47,000 post revisions stored in the database — each one a full copy of the post content. Add expired transients, trashed posts, spam comments, orphaned metadata from deleted plugins, and you’re looking at a database that’s ballooned from 340MB to 1.8GB. That directly impacts query time: a page that takes 890ms to generate with a bloated database might take only 210ms after cleanup. Limit revisions in wp-config.php, schedule regular cleanup with WP-Optimize, and clear out what you don’t need.

    Mistake 14: Ignoring Slow Database Queries

    Not all database queries are equal. Some plugins run dozens of unoptimized queries on every page load — full table scans, queries without proper indexes, or N+1 query patterns that multiply with your content. If your site makes 300+ database queries per page, you have a serious backend performance problem that no amount of front-end optimization can fix.

    How to Find Slow Queries

    Install the Query Monitor plugin (free) on your staging site. It shows you every database query, how long each takes, and which plugin or theme file triggered it. Look for queries taking more than 50ms, duplicate queries, and queries without using an index. This is how professionals identify exactly which plugins are dragging your database performance down.

    Mistake 15: Running Without a Caching Plugin

    We saved this for last because it’s the biggest single fix most WordPress sites can make. Without caching, every visitor triggers the full WordPress execution cycle: PHP processes the request, queries the database multiple times, assembles the page, and sends it back. With page caching, the server stores the finished HTML and serves it directly — bypassing PHP and the database entirely.

    15

    The Biggest Single Fix You Can Make in 5 Minutes

    Without page caching, a typical WordPress site takes 800–2,000ms to generate each page. With caching, that drops to 20–80ms. That’s not a typo — it’s a 10–25x improvement. Install WP Super Cache, W3 Total Cache, or LiteSpeed Cache (if your host uses LiteSpeed), and you’ll see an immediate, dramatic difference in your TTFB. This is the single most impactful change you can make, and it’s free.

    TTFB Without Caching

    1,840ms

    Full PHP + database execution

    TTFB With Caching

    62ms

    Static HTML served directly


    Keep Learning

    Each mistake above has a dedicated deep-dive guide. Start with the areas where your site needs the most improvement.

    Image Deep-Dive

    WordPress Image Optimization

    Formats, compression, lazy loading, responsive images, and preloading — the complete image guide.

    Read the Guide →

    Database Deep-Dive

    WordPress Database Optimization

    Revisions, transients, autoload bloat, and the cleanup routines that keep queries fast.

    Read the Guide →

    The Full Framework

    Speed Optimization Checklist

    A 33-step checklist that turns these mistakes into a systematic optimization process.

    Read the Checklist →

  • How a Slow WordPress Site Is Costing You Money

    How a Slow WordPress Site Is Costing You Money

    Your website just lost another customer. Not because of your product. Not because of your pricing. Because it took too long to load. While you’re reading this sentence, someone clicked on your Google ad, waited three seconds for your page to appear, and hit the back button. That click still cost you money — you just didn’t get anything for it.

    If you’ve already read our guide to Core Web Vitals, you know the technical metrics Google uses to measure site speed. And if you want a hands-on diagnostic checklist, our guide to 15 WordPress speed mistakes walks through the most common problems and fixes. This article is the business side of that equation. We’re not going to talk about LCP thresholds or JavaScript optimization. Instead, we’re going to show you exactly how a slow WordPress site is draining your revenue — and make the business case for fixing it.


    The Numbers Don’t Lie: Speed and Revenue Are Directly Connected

    This isn’t speculation. Some of the largest research firms in the world have quantified the relationship between page load time and money. Here’s what the data says.

    1

    53% of Mobile Visitors Leave if a Page Takes Over 3 Seconds

    Google and SOASTA research found that more than half of mobile users abandon a page that takes longer than three seconds to load. That’s not an edge case — that’s the majority of your mobile traffic walking away before they see a single word of your content, a single product image, or a single call to action.

    2

    7% Drop in Conversions for Every 1-Second Delay

    Akamai’s research shows that each additional second of load time reduces conversions by 7%. Put that into real numbers: if your site generates $100,000 per month and your pages take 5 seconds instead of 3, you’re losing roughly $14,000 every month — that’s $168,000 per year — just from two extra seconds. Even a modest site doing $5,000/month in revenue loses over $84,000 annually from preventable slowness.

    3

    $2.6 Billion in Annual Revenue Lost by Slow-Loading Retail Sites

    Radware calculated that slow page loads cost the US retail sector $2.6 billion in lost sales every year. That’s money that customers intended to spend — they had their wallets out — but the website couldn’t deliver the experience fast enough to close the deal. Your slice of that number depends on your traffic and your load times, but the math applies to every online business.


    How Slow Load Times Destroy Your Conversion Funnel

    The statistics above paint the big picture, but the real damage happens inside your conversion funnel. Deloitte’s landmark study “Milliseconds Make Millions” tracked real user behavior across multiple industries and found that a 0.1-second improvement in site speed increased conversions by 8.4% for retail sites and 10.1% for travel sites. Not seconds — tenths of a second.

    Here’s what happens at every stage of the funnel when your site is slow versus fast:

    Fast Site

    Under 2 Seconds Load Time

    Bounce rate: 20-35%
    Avg. session duration: 3-5 minutes
    Pages per session: 3.5+
    Conversion rate: 2.5-4%
    Google signal: Positive page experience

    Slow Site

    Over 4 Seconds Load Time

    Bounce rate: 55-75%
    Avg. session duration: 30-90 seconds
    Pages per session: 1.2
    Conversion rate: 0.5-1.5%
    Google signal: Poor page experience

    The gap between those two columns is the gap between a profitable website and one that’s bleeding money. And the frustrating part? Most site owners have no idea which column they’re in. Their analytics show traffic coming in, but they’re not measuring how much of that traffic bounces before the page even finishes loading — those visitors never trigger an analytics event.

    Quick Test

    Want to know where your site falls? Run our free mini audit — it takes 30 seconds and will show you your current load times, Core Web Vitals scores, and the specific issues dragging your site down.


    Google Is Penalizing Your Slow Site in Search Rankings

    Google has been using page speed as a ranking factor since 2010, but the stakes went up dramatically with the Page Experience Update. Core Web Vitals — the metrics that measure loading speed (LCP), interactivity (INP), and visual stability (CLS) — are now explicit ranking signals. If your site fails these benchmarks, Google is less likely to show it to searchers, even if your content is excellent.

    The data from Google’s own research confirms the impact: pages that meet Core Web Vitals thresholds see 24% fewer abandonments than pages that don’t. That means users are not only more likely to find your site in search results — they’re more likely to stay once they get there.

    Here’s the compounding spiral that makes this so damaging: a slow site gets penalized in rankings, which means less organic traffic. Less traffic means fewer conversions. Fewer conversions mean less revenue to invest in improving the site. Meanwhile, your faster competitors are climbing the rankings, capturing the traffic you lost, and widening the gap. If you want to understand exactly what these metrics are and how they’re measured, our Core Web Vitals guide breaks it all down.

    The SEO Speed Advantage

    Sites that pass all three Core Web Vitals don’t just avoid penalties — they get a ranking boost. In competitive niches where content quality is similar across the top results, page experience becomes the tiebreaker. Speed can be the difference between position 3 and position 8.


    Slow Sites Waste Your Advertising Budget

    If you’re spending money on Google Ads, Facebook Ads, or any paid traffic, a slow landing page is like pouring that budget down the drain. You’re paying full price for every click, but you’re only converting a fraction of what you should be — because visitors are leaving before the page loads.

    Google Ads uses Quality Score to determine how much you pay per click, and landing page experience is one of its three components. A slow, poorly performing landing page directly increases your cost per click. That means you’re paying more to reach the same audience and converting fewer of them when they arrive.

    4

    2x Higher Cost Per Acquisition on Slow Landing Pages

    When your landing page takes 5+ seconds to load, you’re effectively doubling your cost per acquisition. Consider a business spending $5,000/month on ads with a 3% conversion rate. If slow load times cut that to 1.5%, you’re now paying $2,500/month for conversions you should have gotten for free — that’s $30,000 per year wasted. It’s like paying for a billboard on the highway and then covering it with a tarp.


    The Hidden Costs You Might Not Be Counting

    The revenue loss and ad waste are the obvious costs. But a slow site creates a cascade of less visible damage that compounds over time:

    • Brand perception and trust erosion. Akamai found that 79% of online shoppers who experience a slow site say they won’t return to buy again. Your site speed is your first impression — and you don’t get a second one. Visitors subconsciously equate slow performance with an untrustworthy or unprofessional business.
    • Customer lifetime value lost forever. Every visitor who bounces due to slow load times isn’t just a lost sale — they’re a lost relationship. They’ll never sign up for your email list, never become a repeat buyer, and never refer a friend. The compounding value of that lost customer over months and years dwarfs the initial transaction.
    • Team productivity drain. A slow front-end usually means a slow wp-admin too. Your content team, your marketing team, and your developers are all wasting minutes every day waiting for pages to load, posts to save, and plugins to respond. Across a team, that adds up to hours per week of lost productivity.
    • Opportunity cost of inaction. Every month you delay fixing your site speed is a month of lost conversions you can never recover. Your competitors who invest in speed are capturing the customers you’re losing — and once those customers find an alternative, they rarely come back.
    • The mobile-first reality. Over 60% of web traffic now comes from mobile devices, where connections are slower and patience is shorter. If your site isn’t optimized for mobile speed, you’re failing the majority of your audience. Google’s mobile-first indexing means the mobile version of your site is what determines your rankings.

    Real Results: What Happens When You Fix It

    The cost of a slow site is real — but so is the upside of fixing it. Here are three WordPress sites we optimized, with measurable before-and-after results.

    E-commerce Fashion Store

    WooCommerce store with 2,000+ products and slow checkout.

    Before

    PageSpeed

    34

    6.2s load time

    After

    PageSpeed

    94

    1.1s load time

    Read Full Case Study →

    SaaS Marketing Website

    Content-heavy marketing site with poor Core Web Vitals.

    Before

    PageSpeed

    41

    4.8s load time

    After

    PageSpeed

    97

    0.8s load time

    Read Full Case Study →

    Local Restaurant Chain

    Multi-location restaurant site struggling with mobile speed.

    Before

    PageSpeed

    28

    7.4s load time

    After

    PageSpeed

    96

    0.9s load time

    Read Full Case Study →


    How to Calculate What a Slow Site Is Costing You

    You don’t need a data science degree to estimate the revenue impact of your site speed. Here’s a simple five-step formula any business owner can follow:

    1. Find your monthly visitors. Check Google Analytics for your average monthly sessions.
    2. Find your current conversion rate. Divide monthly conversions (sales, leads, signups) by monthly visitors.
    3. Estimate the speed penalty. If your site loads in 4+ seconds, research suggests you’re losing 14-21% of potential conversions compared to a sub-2-second site (7% per extra second).
    4. Calculate lost conversions. Multiply your monthly visitors by the conversion rate improvement you’d gain from faster load times.
    5. Multiply by your average order value or lead value. That’s the revenue you’re leaving on the table every month.

    Worked example: A service business gets 15,000 monthly visitors with a 2% conversion rate and a $200 average sale. That’s 300 conversions and $60,000/month. If their 4.5-second load time is costing them 15% of potential conversions, they’re missing 45 sales per month — that’s $9,000/month or $108,000/year in lost revenue from speed alone.

    Don’t Guess — Measure

    The formula above gives you a ballpark, but every site is different. Our free mini audit measures your actual load times, identifies specific bottlenecks, and estimates the revenue impact based on your real traffic data. It takes 30 seconds and there’s no commitment.


    Keep Learning

    Understanding the cost is step one. These guides show you exactly how to fix the speed problems that are hurting your revenue.

    E-Commerce Speed

    WooCommerce Speed Optimization

    Cart fragments, checkout performance, and WooCommerce-specific caching strategies that protect your sales.

    Read the Guide →

    The Full Framework

    Speed Optimization Checklist

    A 33-step framework covering every optimization layer from server to monitoring.

    Read the Checklist →

    Prevent Regression

    Stop Speed From Slipping Back

    Why sites get slow again and a monthly maintenance routine to prevent performance regression.

    Read the Guide →


    Speed Is Not a Cost — It’s an Investment

    Reframe how you think about site speed optimization. It’s not a line item on your expense report — it’s a revenue multiplier. Every dollar you spend on making your site faster comes back as higher conversion rates, lower bounce rates, better search rankings, and more efficient ad spend. Unlike ongoing marketing costs, speed optimization is largely a one-time investment with compounding returns.

    The businesses that win online aren’t just the ones with the best products or the biggest ad budgets. They’re the ones that remove friction from the buying process. And the single biggest source of friction on most WordPress sites? Load time.

    Every day you wait is another day of lost conversions, wasted ad spend, and declining search rankings. The math doesn’t change — it just gets worse. We offer transparent, one-time pricing with no subscriptions and no hidden fees. You invest once, and the speed improvements keep paying dividends month after month.

    Your competitors are getting faster. Your customers are getting less patient. The question isn’t whether you can afford to invest in speed — it’s whether you can afford not to.

  • Core Web Vitals for WordPress: What Every Site Owner Needs to Know in 2026

    Core Web Vitals for WordPress: What Every Site Owner Needs to Know in 2026

    Right now, your WordPress site might be quietly losing rankings and driving potential customers away — and you’d never know it from looking at your dashboard. Google has made it clear: how your site feels to real visitors directly impacts where you show up in search results. The metrics that measure that experience are called Core Web Vitals, and in 2026, they’re more important than ever.

    Core Web Vitals are a set of three specific page experience metrics that Google uses to evaluate how users experience your website. They measure loading speed, interactivity, and visual stability — the things that determine whether a visitor stays on your page or hits the back button. For WordPress site owners, understanding these metrics isn’t optional anymore. It’s the difference between ranking on page one and being buried on page three.


    The Three Core Web Vitals Explained

    Each Core Web Vital measures a different dimension of user experience. Here’s what they are and what they mean for your WordPress site.

    LCP

    Largest Contentful Paint

    ≤ 2.5s

    Measures loading performance — how long it takes for the largest visible element to fully render. Usually your hero image or main text block.

    INP

    Interaction to Next Paint

    ≤ 200ms

    Measures responsiveness — how quickly your site reacts when a user clicks, taps, or interacts. Replaced FID in 2024.

    CLS

    Cumulative Layout Shift

    ≤ 0.1

    Measures visual stability — whether elements jump around as the page loads. Caused by images without dimensions, font swaps, and dynamic content.

    For WordPress sites, slow LCP is often caused by unoptimized hero images, no page caching, slow server response times, or render-blocking CSS and JavaScript. INP suffers when too many plugins inject JavaScript that competes for the browser’s main thread. And CLS problems come from images without explicit width and height, web fonts causing text reflow, and dynamically injected content.


    How to Check Your Core Web Vitals

    Before you can fix anything, you need to know where you stand. Here are the best tools to measure your Core Web Vitals:

    • Google PageSpeed Insights — The quickest way to check. Enter any URL and get both lab data (simulated) and field data (real users). Focus on the field data section if it’s available — that’s what Google actually uses for ranking.
    • Google Search Console — Under “Core Web Vitals” in the Experience section, you’ll see site-wide data grouped by mobile and desktop. This shows you which URLs are Good, Need Improvement, or Poor based on real visitor data.
    • WebPageTest — For a deeper dive. It shows detailed waterfall charts so you can see exactly which resources are loading, in what order, and what’s blocking your critical rendering path.

    Scores are grouped into three buckets: Good (green), Needs Improvement (yellow), and Poor (red). Your goal is to get all three Core Web Vitals into the green zone for at least 75% of your page loads.


    The 5 Most Common WordPress Core Web Vitals Problems

    After optimizing hundreds of WordPress sites, we see the same issues come up again and again. Here are the five most common problems dragging down Core Web Vitals scores.

    1

    Unoptimized Images

    The single biggest offender. Sites serving full-resolution PNGs or JPEGs when they should be using WebP or AVIF. Images without explicit width and height cause layout shifts. Images above the fold that aren’t preloaded delay LCP. A single unoptimized hero image can add 3-5 seconds to your LCP.

    2

    Too Many Plugins Loading Render-Blocking Scripts

    Every plugin can add its own CSS and JavaScript — many load on every page, even where not needed. A contact form plugin loading scripts on your homepage. A slider plugin injecting CSS on blog posts. We regularly see sites loading 20-30 separate script files when they only need 5-6.

    3

    No Caching Strategy

    WordPress generates pages dynamically by querying the database on every request. Without caching, every visitor triggers PHP execution and database queries. You need page caching, object caching (Redis/Memcached), and browser caching with proper cache headers.

    4

    Poor Hosting or No CDN

    Your server’s response time (TTFB) sets the floor for your LCP. If your server takes 800ms to respond, your LCP can never be faster than that plus render time. A CDN puts static assets on servers worldwide so visitors get content from the nearest location.

    5

    Heavy Themes and Page Builders

    Many popular themes and page builders generate massive DOM bloat. A simple section that could be 10 elements becomes 50-60 nested divs with inline styles. This slows rendering (LCP), makes interactions sluggish (INP), and causes layout shifts (CLS).

    Want a Deeper Diagnostic?

    These five problems are just the start. Our complete guide covers 15 WordPress speed mistakes that are killing your site — with specific fixes for each one, from server configuration to database cleanup.


    Quick Wins to Improve Each Metric

    You don’t need a complete overhaul to see improvements. Here are targeted fixes for each Core Web Vital.

    Improve LCP

    • Preload your hero image with <link rel="preload"> so the browser fetches it immediately
    • Convert images to WebP or AVIF format (30-50% smaller than JPEG)
    • Enable page caching so the server returns static HTML instead of processing PHP
    • Inline critical CSS so the browser doesn’t wait for an external stylesheet to start rendering

    Improve INP

    • Defer non-critical JavaScript using the defer or async attribute
    • Audit your plugins — deactivate unused ones, and conditionally load scripts only where needed
    • Reduce DOM size by switching from a heavy page builder to a lightweight block theme
    • Break up long JavaScript tasks into smaller chunks so the main thread stays responsive

    Improve CLS

    • Always set explicit width and height attributes on images and videos
    • Use font-display: swap in your @font-face rules to prevent invisible text during font loading
    • Reserve space for ads, embeds, and dynamic content with CSS min-height or aspect-ratio
    • Avoid injecting content above the fold after the page has started rendering

    When DIY Isn’t Enough

    The quick wins above can make a real difference, but there’s a ceiling to what you can achieve with plugins and basic settings alone. Some of the most impactful optimizations require server-level access — configuring Nginx or LiteSpeed rules, setting up Redis object caching, tuning OPcache, and implementing proper HTTP/2 or HTTP/3 push. Database optimization needs careful handling: cleaning up post revisions, transients, and autoloaded options without breaking anything requires knowing exactly what’s safe to touch.

    Then there’s the compounding complexity. A single fix in isolation might seem simple, but getting all three Core Web Vitals into the green simultaneously — while keeping your site functional, your plugins working, and your content looking right — is where professional optimization separates from guesswork. We’ve optimized over 200 WordPress sites with a proven methodology that addresses every layer of the stack, from server configuration to front-end delivery. The result: measurable, lasting improvements that show up in both your PageSpeed scores and your bottom line.


    Keep Learning

    Core Web Vitals are just the metrics. These guides cover the specific optimization techniques that move the needle.

    Fix Your LCP

    WordPress Image Optimization Guide

    Formats, compression, lazy loading, and preloading — everything that impacts your Largest Contentful Paint.

    Read the Guide →

    The Full Framework

    Speed Optimization Checklist

    A 33-step framework covering every optimization layer from server to monitoring.

    Read the Checklist →

    Fix Your TTFB

    WordPress Hosting for Speed

    How to evaluate hosting options and know when it’s time to migrate for better performance.

    Read the Guide →


    Take the First Step

    Core Web Vitals aren’t just a technical checkbox — they directly impact your search rankings, your conversion rates, and ultimately your revenue. Every day your site underperforms is a day you’re leaving money on the table.